Blog > 12 Handy Updates You Can Make to Your Website in 15 Minutes
When was the last time you got to show your website some love?
I get it, running a business comes with a vast array of proverbial plates to spin at once and sometimes, the website gets pushed to the back of the to-do list. But, if you have even just 15 minutes to spare over the course of your week, I’ve got some ideas that you can implement on your website to keep things fresh and moving in the right direction.
Over the past year, I’ve been sharing these ideas in our Facebook community, the Create Members Group. It’s a place where people who use the Create Platform can come together, share ideas and inspiration for their website and benefit from the support of a network of other small business owners.
Below, you’ll find some of the favourite 15-minute tips over this time period. It’s a wonderfully random selection of mostly unrelated tips, covering everything from design ideas to SEO improvements. Each has helped our members take action towards improving their websites each week, and I hope they’ll help you too!
Want Your Own Website?Start Building Today!
No credit card needed. By submitting this form you agree to our T&Cs and Privacy Policy.
Update Your Favicon
![]()
One of my favourite tips to share is how you can quickly update your favicon. I often find that not everyone knows yet that you can update our default logo in the browser tab to your own logo. The best bit is it only takes a few minutes to set up.
All it takes is a quick and free reformatting of your logo which you then need to upload to your files area. It’s so straightforward to implement and it can make such an incredible difference to branding when everything feels congruent with the rest of your site.
While you're doing this, did you know that you can also create an iOS home screen icon for when people save your website to their device? This can be set up in a very similar way to your favicon.
If you don’t yet have something you can use as your favicon, Canva is a brilliant platform for designing and editing graphics and images. Why not see if you can find an icon that would fit your website in their library of resources?
Fit More Content on Your Page with Expanding Blocks
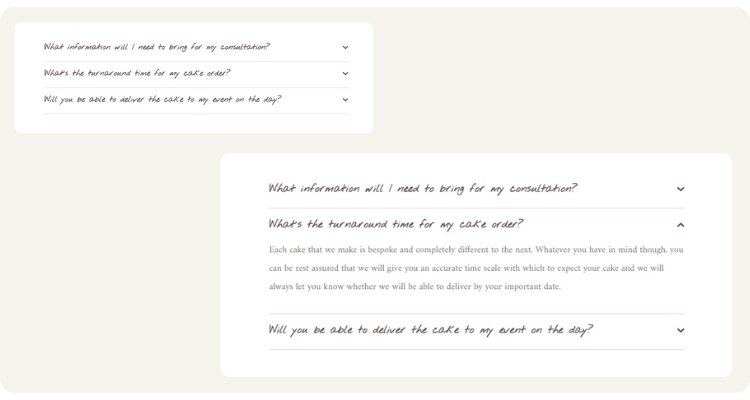
Expanding Content Blocks are a compact way to answer more of your visitor’s questions without them having to search very hard to find the information they’re looking for. If you’re making life easier for the people on your website, they’ll be more likely to stick around and browse your shop or services!
Not only that, but these Blocks are a neat way to squish more highly specific content into your pages which could potentially help your page rank higher in search when done properly.
You can find different styles of Expanding Content Blocks in the Block Selector. If you look under the heading Blocks that include… and click Expanding Content, you’ll find all the options available to fit your preference here.
Quickly Find the Perfect Colour Scheme

Are you struggling to find a colour scheme that feels like it fits with your website? It’s something I know I’ve certainly had difficulty with in the past. However, you can take a prominent image from your website (like the hero image of your page if you have one) and put it into Canva’s colour picker to find a perfectly complimenting colour scheme.
This will pick out the key colours from your image that balance well with each other. Using this information, you can incorporate these colours into the Design Section of your account to create a consistent colour scheme that works.
You could also use this with the Custom Colour Palettes feature for some exciting and colourful calls-to-action or vibrant and thematic landing pages.
Improve a Page’s Bounce Rate
Bounce rate is a metric you can find in your analytics platform that tells you the percentage of users who land on your page, only to leave without browsing your site. Typically, the lower the bounce rate of your page, the more helpful it has been to visitors by providing them with the information they are looking for.
A few ways you can focus on reducing your bounce rate include:
-
Bring key information to the top of the page. Help your visitors to know immediately that they’re in the right place and what they have to gain from visiting and staying on your website.
-
Improve your page speed. Many users tend to get impatient very quickly when waiting for a page to load, so try to spare them this frustration where you can. If your page is heavy with pictures and HTML Fragments, consider removing some that add less value to the page to improve speed.
-
Make taking action obvious. Your visitors need to know what the next step is. You can reduce your bounce rate by making the action they need to take clear and accessible at all times.
Improving your bounce rate can have a knock-on effect of improving your SEO as it signals that your website is helpful to the people who are clicking through from their results pages; so you have more happy visitors and a happy Google too!
Fix Broken Links On Your Site
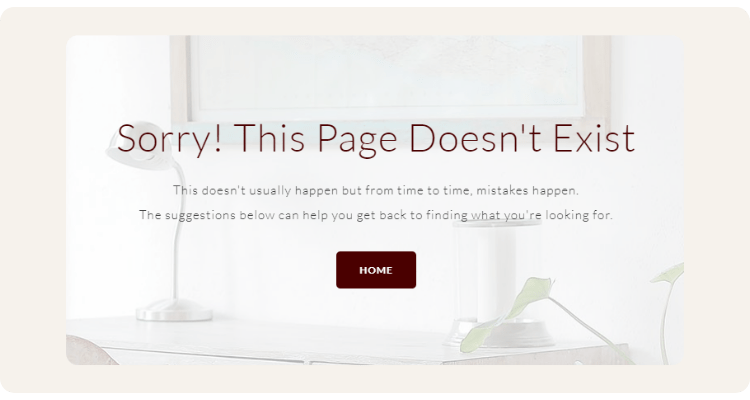
Broken links are links that don’t go anywhere and usually end up navigating a user to a 404 page. Broken links naturally start to occur on websites over time as things change and posts are moved or deleted. These aren’t great for user experience and search engines don’t like them either.
There are several online tools that you can use that will point out how many broken links you have and where they occur so you can seek them out and update them. I personally use brokenlinkcheck.com. All you need to do is enter your URL, select the option for Report distinct broken links only and run the report.
It will generate a list that tells you what link is broken and where the link has been used in your content (the link text). You can also click the URL button to bring up the page that the broken link is on. Once you know which link is broken, all you need to then do is remove the link or replace it with a new and more up-to-date link.
Depending on how often you’re posting content to your website, this should ideally be done at least once a month to check everything’s in order. The more you keep on top of fixing your broken links, the quicker a job that it becomes!
Convey Your Key Value with Icon Blocks
![]()
Have you got an Icon Block anywhere on your site? When someone visits your site, they want to know what value you’re offering over your competitors. They want to know what makes you unique and what makes you special - but they also don’t want to have to search for this information!
This is where the Icon Blocks come in handy. These kinds of Blocks are ideal on a home page or any other page where you are introducing yourself to a new visitor / customer. They are perfect for making short snippets of key-value stand out on the page. Using these, you can highlight what sets you apart from the competition in a snap and they help you convey exactly what makes you special in a way customers will notice and digest.
I also love these Blocks because of the huge library of icons that comes with them. Any of the icons are entirely interchangeable. Simply hover over the Icon you want to swap and click the Change Icon button. There’s a search bar you can use to find exactly what you’re looking for to emphasise the point you’d like to make about your business.
Learn How Your Visitors Find Items in Your Store
![]()
There are lots of different ways to do Keyword Research. If you have an ecommerce store with a search function though, you could be sitting on a wealth of information already. Knowing what people are typing in to find your products on your website can help you to discern how they’re trying to find these same products through Google; which you can then optimise your product pages for.
Site Search Tracking is straightforward to set up in Google Analytics but you’ll need to give it some time to pick up any data (It won’t show you any data from before it was set up). You can view how many sessions someone used your search, what they searched for, what pages they searched from and where they landed after using the search.
You’ll probably come across some weird and wonderful search terms being used by your website visitors, but no doubt you’ll also come across a few gems and maybe some completely new ideas you may not have considered before. If you’re matching the language of your customers, you’ll have a much easier time of being found by them in search engines and improving their experience of your site altogether.
Start Collecting Data for Future Use
![]()
The Facebook Pixel tracks your website visitors as they browse your site. It monitors what kind of actions they’re taking and how they’re using your site. It then uses this information to help determine who your ideal customer is and how you can find them through your advertising on Facebook. Setting up the Pixel with Create is as simple as copying your Pixel ID and pasting it into your Site Information (on our Business Plan).
For the growing business, there are two major benefits to having the pixel. The first is that you can use your Facebook Pixel to determine whether people are taking certain actions on your site or not. For instance, if you send out an email newsletter, you could see how many people went from the Landing page on your website to make an enquiry or purchase. This helps you to determine whether or not your campaigns have been a success more accurately.
The second is that for any business that wants to step into advertising across Facebook and Instagram, having the Pixel set up will be an invaluable asset to you. With what it can learn from how people engage with your ads and interact with your website, it can help you to target more people who would be your ideal customers and can work to improve the results you get for your ad spend over time.
Even if you don’t plan to use this data at the moment, whether through advertising or tracking actions as mentioned above, it’s well worth installing the Pixel so it can collect as much information as possible in the meantime. The more information it has, the better it can perform and the more information it can provide you when the time comes.
Keep Google Informed About Your Updates

Each time you republish your website, do you notice the little message from us recommending you resubmit your sitemap? There’s a good reason for it.
When you submit your sitemap to Google, you’re letting them know that changes have been made and that they need to update their index. This is often a lot quicker than waiting for Google to find your updated pages by themselves. The sooner they know, the sooner you can see what impact your changes have had and, hopefully, you’ll start benefitting from the subsequent ranking improvements for your pages.
You can also queue changes for just one updated page in Google Search Console using the URL Inspection Tool. This is especially important if you’ve just published some new content. You can help get your hard work indexed sooner, and it can help protect you against content theft and people claiming your work as their own. It has been known that some people will try to index others’ content first so they can claim they were the ones to publish the piece originally!
Feature Your Glowing Feedback

We’ve talked before about the power of testimonials. They are vital for helping to build trust with your prospective customers or clients and can dramatically help to improve conversions. How are you highlighting the most helpful and inspiring feedback you’ve received on your website?
On Create, the Team have created some specially designed Content Blocks for you to do just this. In your Block Selector menu, you will see a Quote option under Blocks designed for…. You’ll find some new Blocks and longer-standing Blocks that have been perfectly designed to convey your highlighted feedback in its best light.
You could use a Trustpilot embed or embed individual reviews from Facebook. However, the aforementioned Content Blocks really help to showcase your best testimonials by seamlessly blending them into the design of your website and giving them their own space on the page.
Try using the to break up long sections of content on your page. You could even build a page specifically for the purpose of showcasing your testimonials and acquiring new ones!
Improve Your Meta Information with Concrete Data
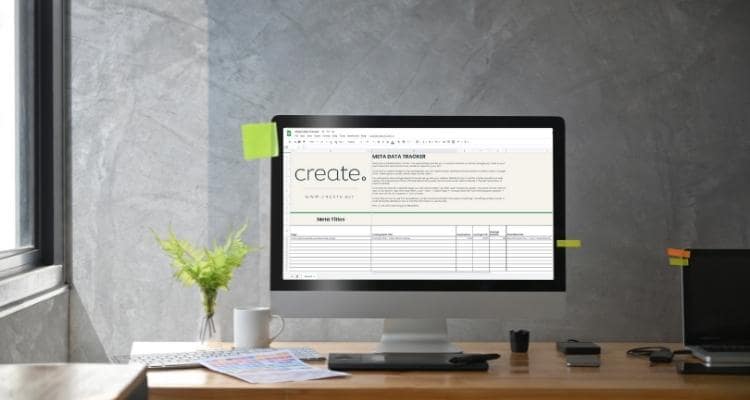
Everyone wants to get their metadata right and for good reason. Relatively small changes can make a huge impact on your page’s rank in search engines. The problem is that your metadata will never be perfect. You will never know if there is a combination or sequence of words that will work better for your page than what you already have… until you test it.
If you can create a monthly practice of updating and testing new metadata for your pages, you’ll soon find that your rankings and your clickthroughs will start to improve. If your stats improve by the end of the test, great! You have new metadata that works better than before. If your test goes the other way, that’s fine too, all you need to do is switch it back.
I’ve built a Metadata Tracker to help you to do this. You can easily track the changes you make to your metadata across several pages. By inputting the data from Google Search Console, the spreadsheet will highlight where you have improved and where you have declined so you can see at a glance what changes you need to make.
This process of continual testing and implementation is a practice you can carry forward for any aspect of your website you’d like to improve. By doing so, you’ll ensure your website continually grows over the long-term. For now, why not try out the Metadata Tracker and run a few tests to see where you improve!
Start Building an Email List

Writing a weekly, bi-weekly, or monthly email may not be at the top of your priority list at the moment but getting started with an email list certainly should be. If someone visits your website, and loves what you offer, but doesn’t make a purchase or enquiry on their first visit, an email in their inbox could serve as the perfect reminder if they’ve subscribed.
Some email platforms like Mailchimp offer embeddable signup options that populate your email list directly. However, you can achieve the same result by adding a form that does this for you. All you really need to collect is a name and an email through your form. The details will be emailed to you, you just need to add them to a spreadsheet that you then upload as a .csv file to whatever platform you’ve chosen to populate your email list.
While it’s good practice to get in the habit of writing a regular update, you don’t need to pressure yourself into doing anything immediately if it doesn’t fit into your schedule. The important thing is that you’re building a list for the future. Email can undoubtedly be a useful tool for bringing your warmest leads back to your website to make a purchase or follow up with you.
Wrapping Up
It’s easy to get carried away with how much work you think you need to do to your website each week. The thing is, if you commit to making even just a small update every now and then, you’re continually working towards its growth and success.
Not all of these 15-minute tips will be game-changers for your website. However, over time, they will all work towards creating a version of your website that gets found and delivers the best experience for your customers and clients.
Your website is the number one vehicle to your success online so don’t be afraid to show it a little love from time to time with these quick tips!
Remember, if you’re a Create customer and want more tips like this, as well as the support of a community, you can come and join the Create Members Group on Facebook for more ideas like this and more!


