Help Centre
Support > Ecommerce > Running A Sale
How To Run A Sale In Your Shop
Shop sales can be a real benefit to many retailers at certain times during the year. That’s why Create offers a great feature so you can easily generate and run a sale within your shop.
Whether it’s a January sale and you want to get rid of some leftover stock or you simply wish to run a sale for promotional purposes, setting up a Sale with Create is made easy for you.
Setting Up A Sale
To get started creating your shop sale, follow the steps below:
1. Log in to your Create account and click on Shop in the top menu
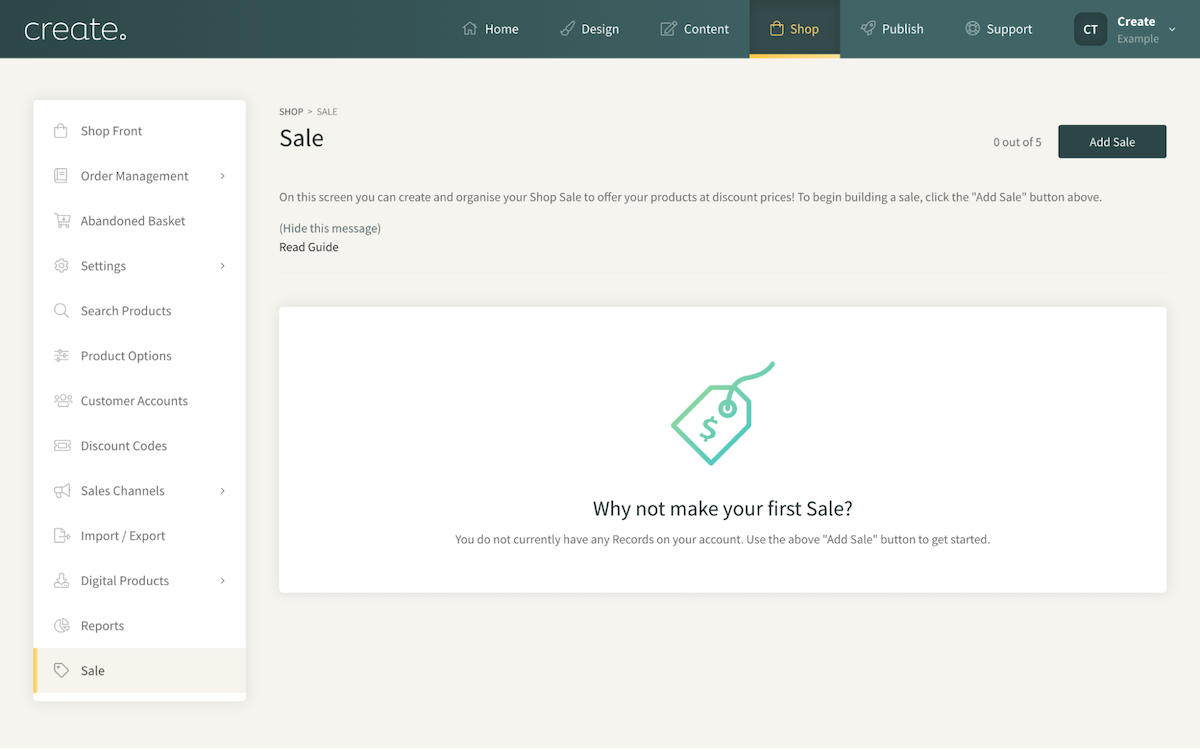
2. Locate item Sale listed in the left-hand menu

3. Click the Add Sale button to start the sale setup process
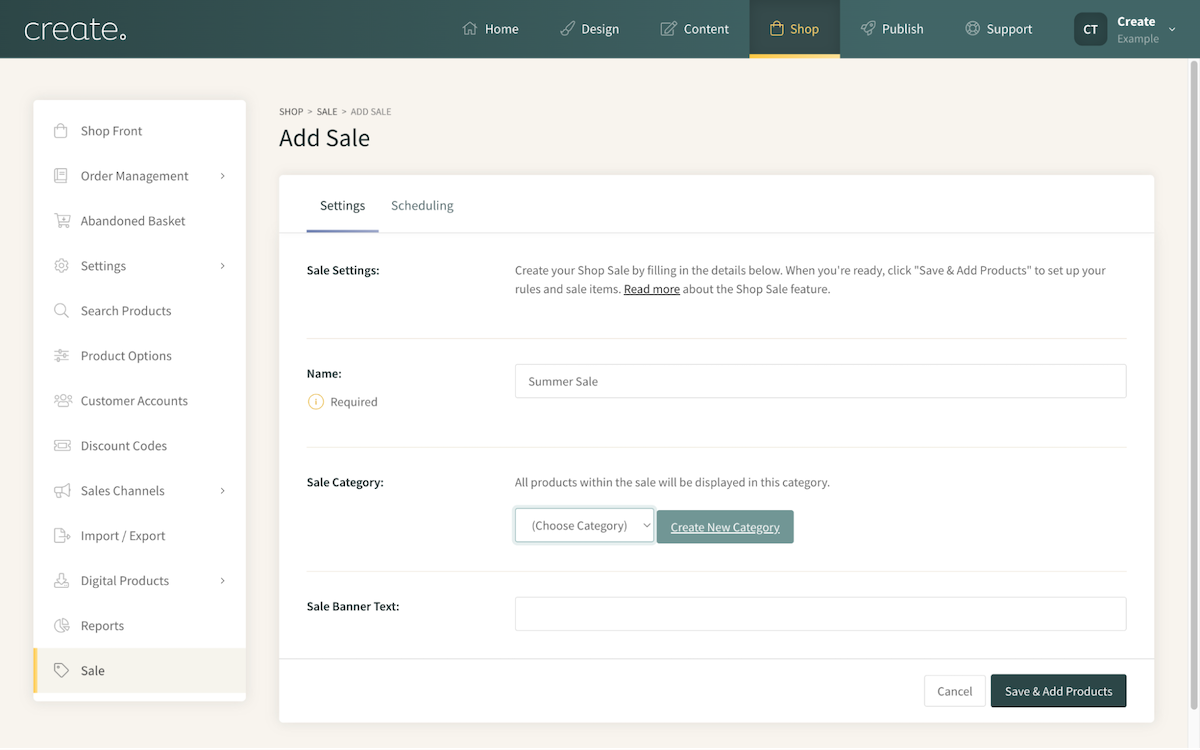
4. Begin by giving your sale a name, for example, "Summer Sale".

5. The Sale Category setting allows you to select a specific category where you'd like your sale items to be located. Products will remain in their original categories but will also be displayed in the category that you choose from this drop-down option. Leaving this set to (Choose Category) will mean the sale products just show in their original locations.
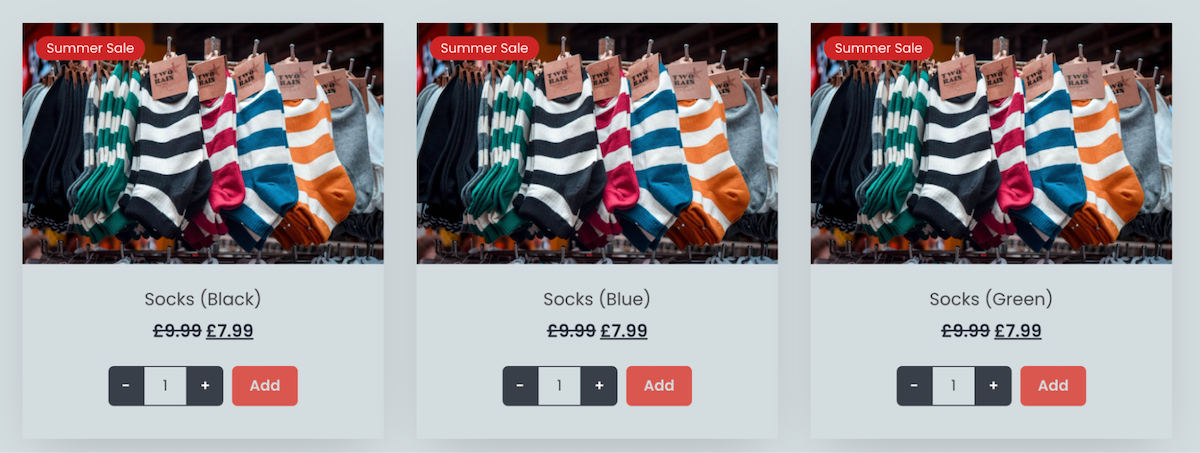
6. The Sale Banner Text gives your control over the sale banner which displays on Sale products in the category view. An example of how the Sale Banner looks can be seen below, using the Sale Banner Text ‘Summer Sale’.

7. After giving your Sale a name and banner text, click the Save & Add Products button to start the process of setting up a rule for your Sale and adding your products to it.
Refer to our guide Using Rules With The Shop Sale Feature for details on how to set up your Sale Rules and add products to the sale.
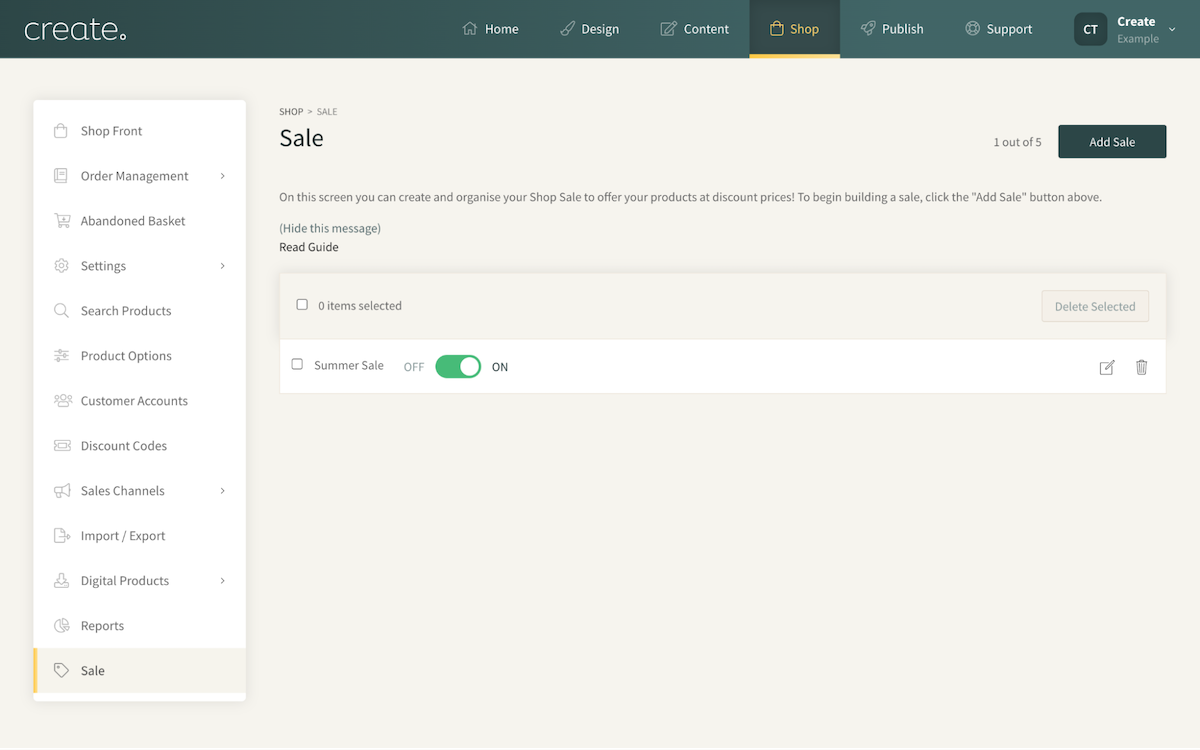
8. After you have added a sale rule and added your products, your sale is set up. When you're ready for your sale to begin, turn the toggle to ON and you're sale will be active right away.
Related Articles
More Questions?
If you have any further questions, please get in touch and we will be happy to help.
Get in Touch


