Help Centre
Support > Promoting Your Website > Email Marketing
How to add a newsletter signup form to your website
With Create you can have a newsletter sign-up form on your website allowing your site visitors to enter their email to stay informed about your business and products. When a customer enters their email address, you will be sent an email notification containing their details so you can make a record of these.
**Please note that the Create newsletter sign-up form can't be connected to external mailing systems. Sign-ups need to be manually added to external platforms.**
Using our default newsletter sign-up form is a great way to start collecting email addresses to make a mailing list of people interested in your business and product updates.
If you find that the volume of people requesting to join your mailing list becomes quite high, you might want to look into an automated form provided by another service, such as MailChimp, to handle the sign-ups automatically for you. We have a useful help guide which explains how to set up and add a MailChimp form to your website, you can view the guide here.
In this help guide we will cover how to enable our default newsletter sign-up form in your website footer and also how to add one to a page using the Newsletter block.
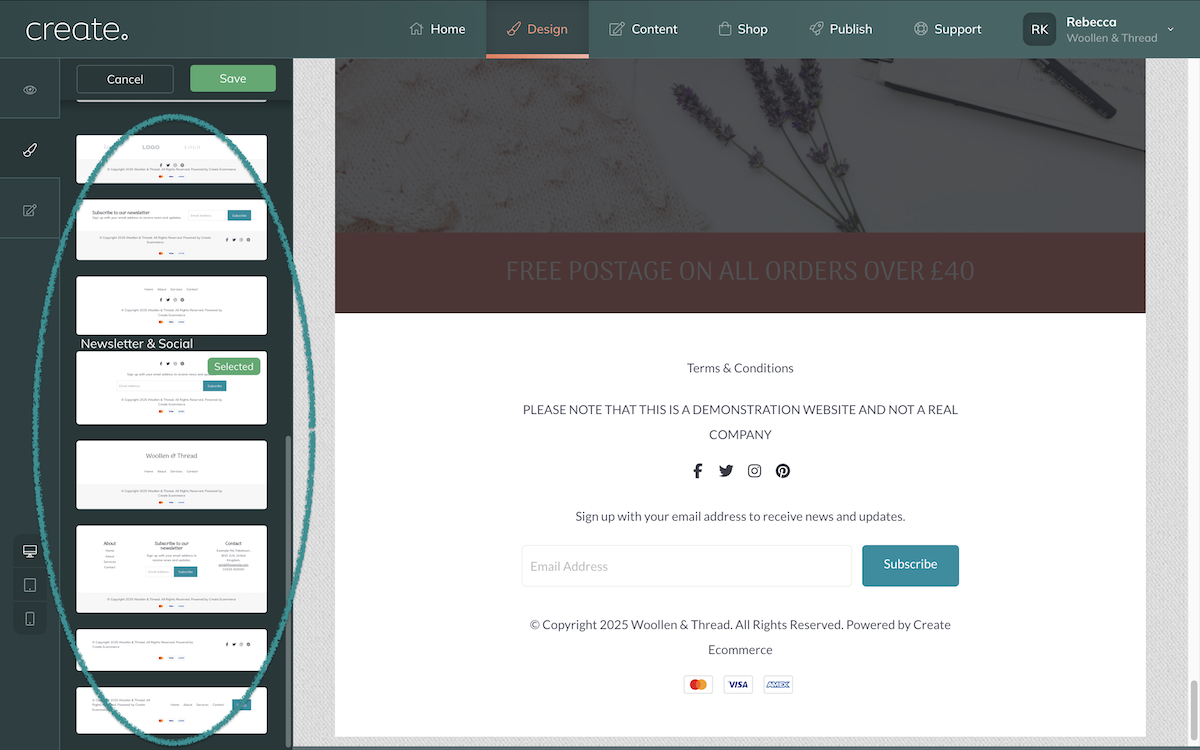
Adding A Newsletter Sign-Up Form To The Website Footer
You can have a newsletter sign-up form present in your website footer, this is a great way to constantly have it accessible for your visitors to easily locate and enter their details.
To have one located in your website footer, you need to select a footer which features a newsletter sign-up form. You can choose from a range of different footer layouts which support the newsletter sign-up form in the Design > Edit Footer section of your account. If you browse the list of footers, you will see some featuring a newsletter form and this will be stated in the footer layout name.

For more information about altering your website footer and selecting which content appears within it, please see this help guide.
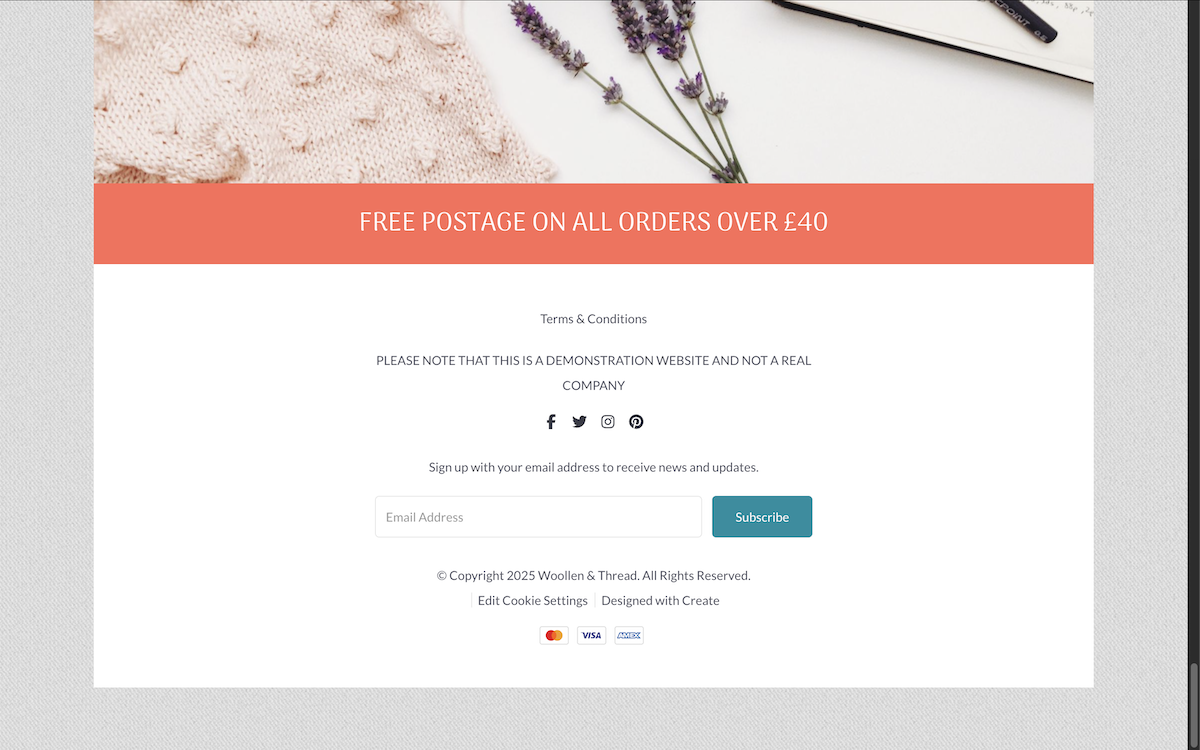
The result will be a newsletter sign-up form displayed in your website footer.

How to Add A Newsletter Sign-Up Form To A Content Page
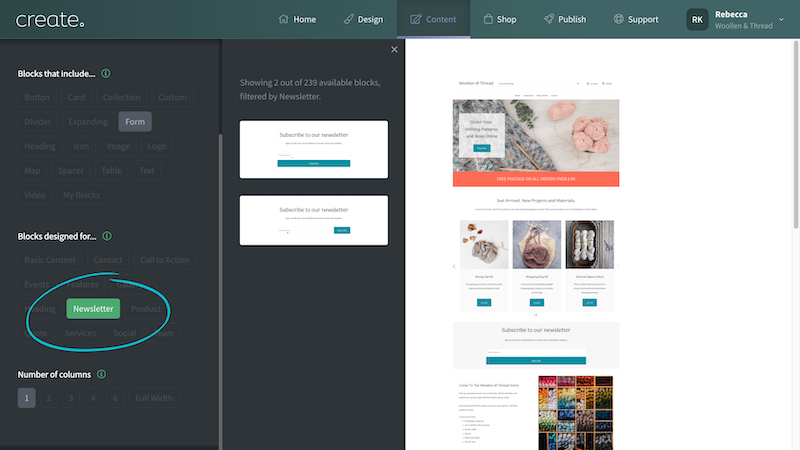
There might also be situations where you would like to place a newsletter sign-up form on a single specific page. For these occasions, you can use the Newsletter block available to you in the Block Selector. Whilst editing any Content page, click the Add Block button and select the Newsletter filter (shown in the image below).
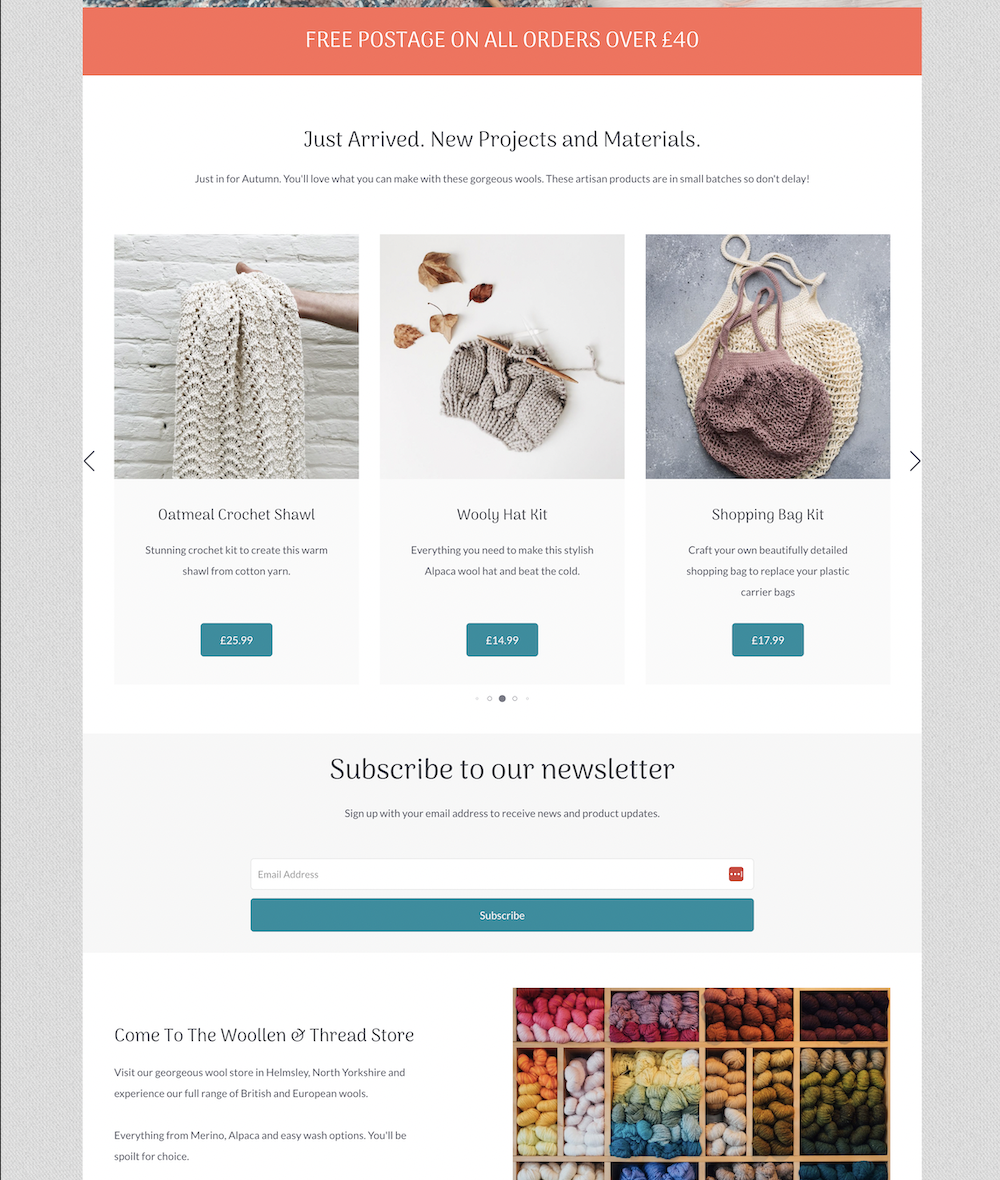
There are multiple variations you can choose from and these can be added to any Content page on your website, like any other Block we offer.

Using this block you can add the sign-up form anywhere on a page. This also allows you to have a newsletter sign-up form located just on a single page, rather than in the footer if you would prefer.
If you decide to use MailChimp to generate your newsletter, you will need to set up an account here. Once you have registered an account, you will then need to set up a "List" with all of your contacts, which you can read more about here.
When your list is fully populated, you can create a campaign, which is effectively a newsletter that you can send out to the customers on your list. For more information about this please read the guide here.
Related Articles
Related Articles
More Questions?
If you have any further questions, please get in touch and we will be happy to help.
Get in Touch


