Help Centre
Every valuable dialogue has a discussion going both ways. A conversation with another human being is time better spent than a conversation to the wall! That’s why comments are a valuable tool to have enabled on your website.
Comment boxes allow your users to share their thoughts on your pages, products or topics and can be the beautiful beginning of an engaged community surrounding your website. In addition, this kind of User-Generated Content can help contribute to a higher SEO ranking for your pages when moderated and executed correctly.
Disqus is an excellent tool that you can easily install on your website to enable comments and moderate your content. They facilitate millions of comments across the web each month and are trusted by website owners worldwide in managing their online discussions.
This tool is free to get started with and offers you a great deal of functionality straight out the gate. There is also a choice of premium packages for you to consider if you are looking to take community engagement further on your website.
Here’s how you can get started with Disqus:
How to Add Disqus to Your Website
1. Head to Disqus.com and create an account
2. Click I want to install Disqus on my site
3. Enter the name of your business and the category that best describes it
4. Select your preferred package. For this guide, we will be using the Basic Package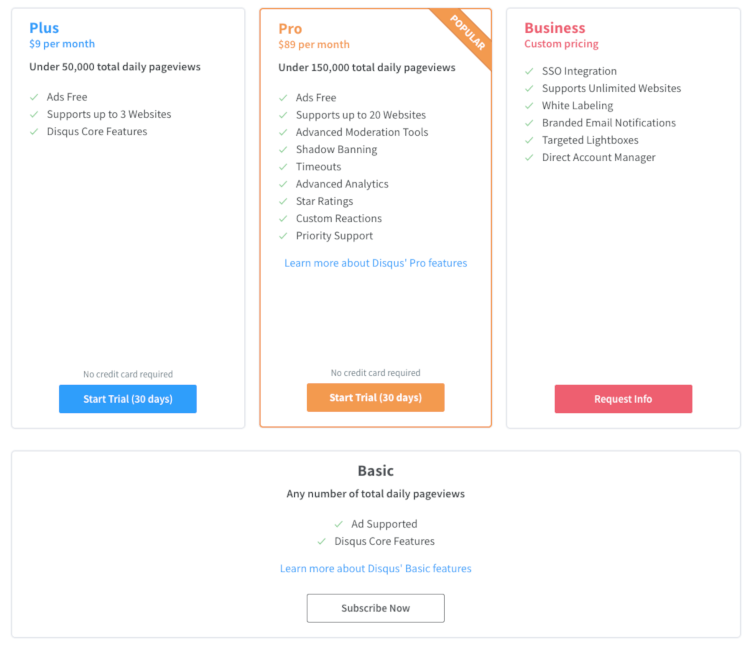
5. Click to use Universal Code for installation
6. Copy the code from Step 1 to your clipboard.
7. Log into your Create Account
8. Go to Content from the top menu
9. Select HTML Fragments from the left-hand menu
10. Click on the New HTML Fragment button at the top of the screen
11. Give the HTML Fragment a description for reference (e.g. Disqus Comment Box)
12. Paste your HTML code into the large HTML Code box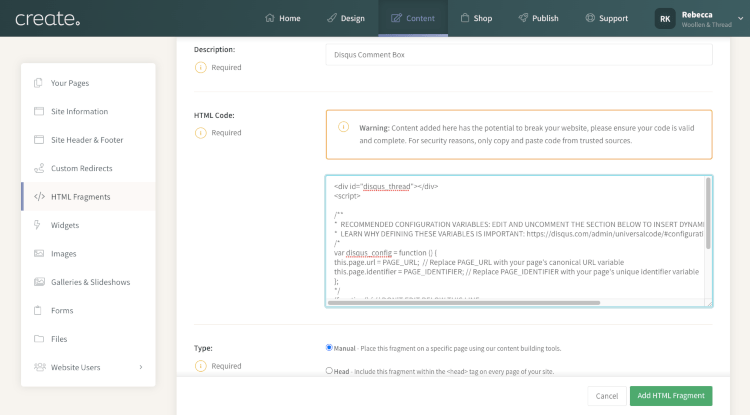
There are two lines of code that you need to adjust in order for Disqus to track your comments and engagement across your pages properly. They are highlighted for you in the image below:
13. i) Change this.page.url = PAGE_URL; to this.page.url = window.location.href;
ii) Change this.page.identifier = PAGE_IDENTIFIER; to this.page.identifier = this.page.url;
14. Click Add HTML Fragment
How to Configure Disqus
1. Head back to Disqus and click Configure
2. Fill in your details and preferences on the next page. (You will have needed to have verified your account through the email they sent you first).
3. Head to disqus.com/admin/ and sign in to access your dashboard
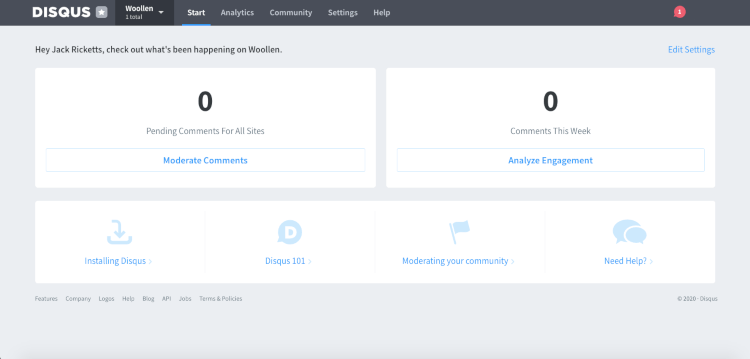
4. Complete your configuration from Settings in the top menu
How to Add Disqus to a Page
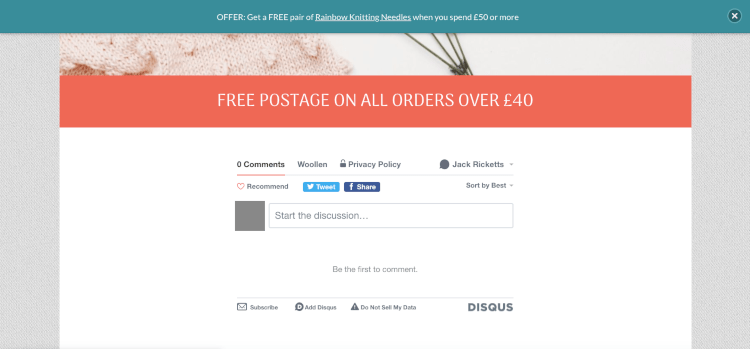
Now that you have added the code to your website and configured the plugin to your preferences, you need to add your new comment box to your website pages.
To Add Disqus to a Content Page
1. Open up the page you would like to edit from the Content tab
2. Open the Block Selector (+ Icon in the bottom-left corner)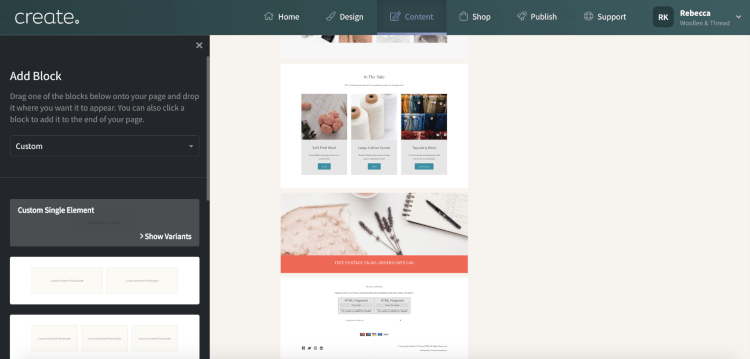
3. Select Custom from the drop-down menu
4. Drag the Custom Single Element Block where you would like your comment box to appear on the page.
5. Move your cursor over the Custom Element Placeholder and click Add Custom Element
6. Select HTML Fragment from the drop-down box and click Done
7. Move your cursor over the HTML Fragment and click Settings
8. Select the Disqus Comment Box HTML Fragment you created from the drop-down box and click Done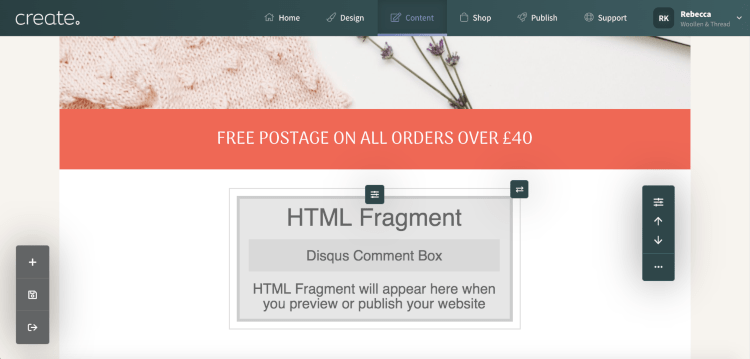
You will need to publish your website for the changes to take effect.
To Add Disqus to Your Products or Blog
1. Open up your Product or Blog in Create to edit
2. In the Blog Content Box or Product Long Description, move your cursor to where you would like your comments to appear on the page.
3. Click the HTML icon from the toolbar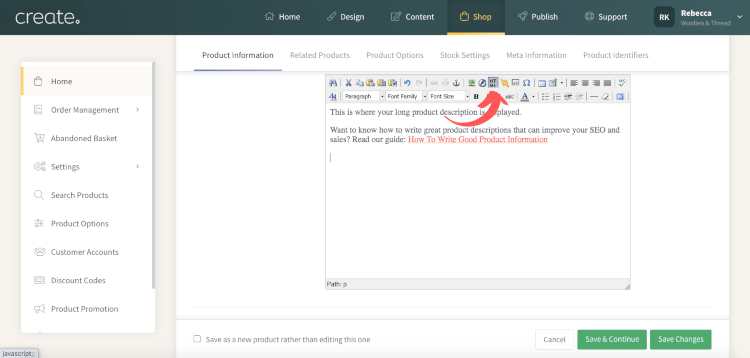
4. Select your Disqus Comment Box from the list of HTML Fragments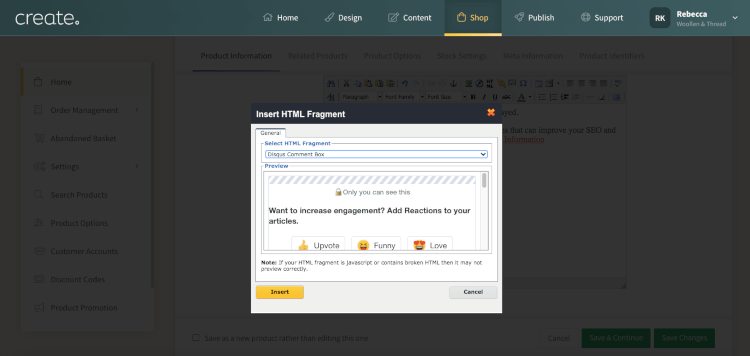
5. Save your changes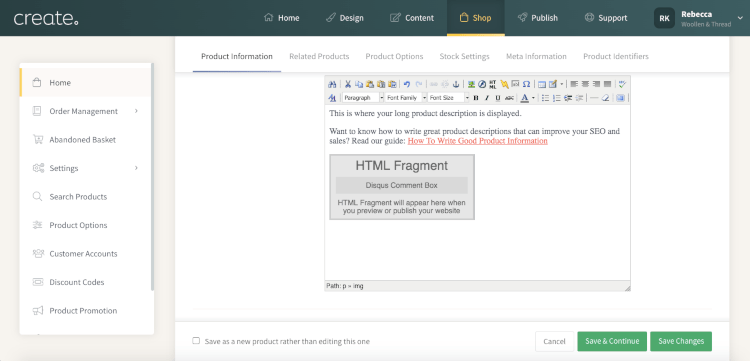
Again, you will need to publish your website for these changes to take effect.
Related Articles
More Questions?
If you have any further questions, please get in touch and we will be happy to help.
Get in Touch

