Help Centre
Support > Designing and Building Your Website > Designing Your Website
Creating a banner for your website using pixlr.com
If you want to add your company logo to your Create website, you will need to insert it into the logo area of your Design Studio. However, you may want to create your logo into a banner and for this you will need to use some photo editing software.
Pixlr.com is a free to use, browser-based photo editing program. You will not need to download any software to use it, so you create your banner here, ready to upload in to your Create account.
In this guide, we will be covering how you can use Pixlr.com to turn your company logo into a banner, add some text, colour and finishing touches for a more professional look on your Create website. Please note that this is a longer guide to ensure all the steps are clear!
Before you begin, please go to: http://www.pixlr.com/
First you will need to set up your canvas to work on:
- To create a banner base, choose "Open Pixlr Editor (Advanced)" to get started.
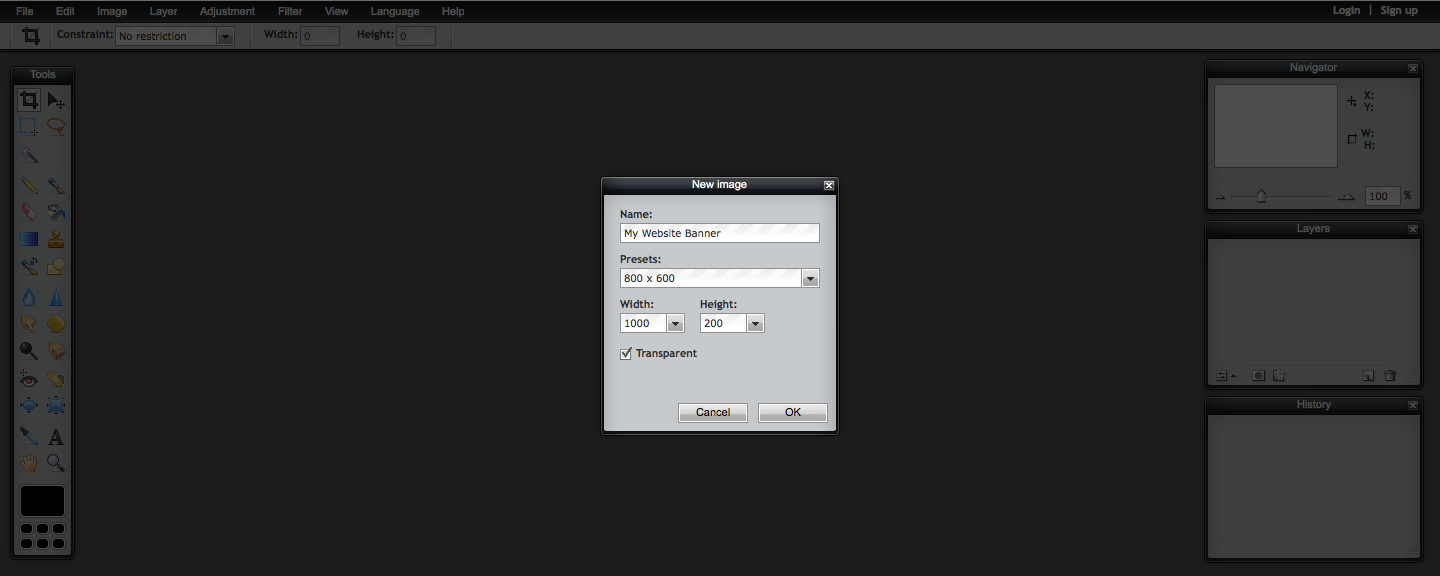
- A pop up with some options will appear. Click “Create a new image” to open and start a new project.
- Begin by naming my website banner something relevant. (So its easy for you to find later.)
- Then in the “Width” and ”Height” boxes, set the values to “1000” and “200”. ??This is if you want to use this size banner with your Create website
??(don’t forget you can also choose the other banner size option from your Create account which is "?780 X 120?" if you like). - Check the “Transparent" box and Click “OK”.
Setting up your banner.
Now, you will want to add your logo. First, you will need to open them:
- The page that opens is your working area on Pixlr.com.?
- To open your image click “File” from the Pixlr.com menu, then choose “Open Image...”.
- You can then browse for the image on your computer then click “Open”.
- You will now have two different windows. ??One with your image or logo on and the other with your banner canvas.??
TIP: You can hover over icons to show a “tool-tip’ for more information about what that icon does.
?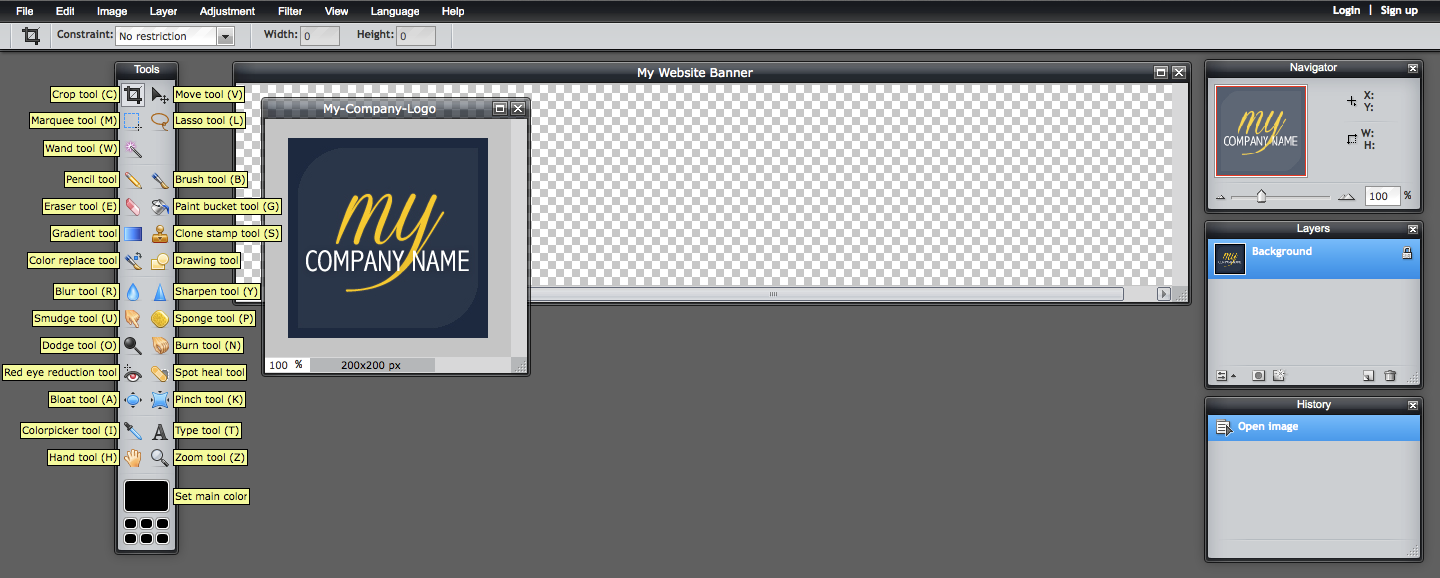
Your banner and logo open on pixlr - plus all of the tools labelled.
The next stage is to get your logo on to your banner canvas:
- You will need to use the “Marquee Tool” from the left hand toolbar and drag a box around your logo/image to highlight it.
- You can then copy it by clicking “Edit” from the Pixlr.com menu and choosing “Copy”.
- Next, click on your banner canvas, to bring it to the front.
- Click “Edit” from the top menu and “Paste” to paste your logo/image onto your banner.
At this stage, you might find the height of your logo or image is a little too big for the height of your banner, so you may need to re-size it.
To re-size your logo, the easiest way is to “free transform”:
- Click “Edit” from the Pixlr.com menu, then choose “Free Transform” from the drop down menu..
- This will bring up the usual white boxes in the corners of your image so you can drag to resize.
- Re-size your image so that is fits in the shape of your banner.
![]()
Inserting and resizing your logo on to your banner.
TIP: don’t forget to hold down the Shift key as you drag to keep the original ratio of your image and ensure that it doesn't distort.
Once your image has been re-sized, you may want to reposition it.
To move it, you will need to click the “Move tool” from the left hand toolbar simply click and drag to reposition.
Now you will have your logo on your banner canvas.
If you leave your logo with a clear background, the background will not show when you upload it to your website and will look something like this:

Your logo on a transparent banner. The checkered pattern will not show up on your website.
However, you may wish to add a background colour to fill any banner space.
To do this, first you should make a new layer:
- Click the “New Layer” icon in the Layers window (it’s the one that looks like an upturned page next to the bin icon).
- Then double click the layer to rename it (it helps to keep clear about what all of your layers are for).
- Drag your new layer to the bottom below the logo layer. This will ensure that the logo is not hidden.
- Make sure this layer is now selected. It will be highlighted to indicate this.
TIP: Using layers helps you to edit certain areas of your design work at a time without disturbing other aspects.
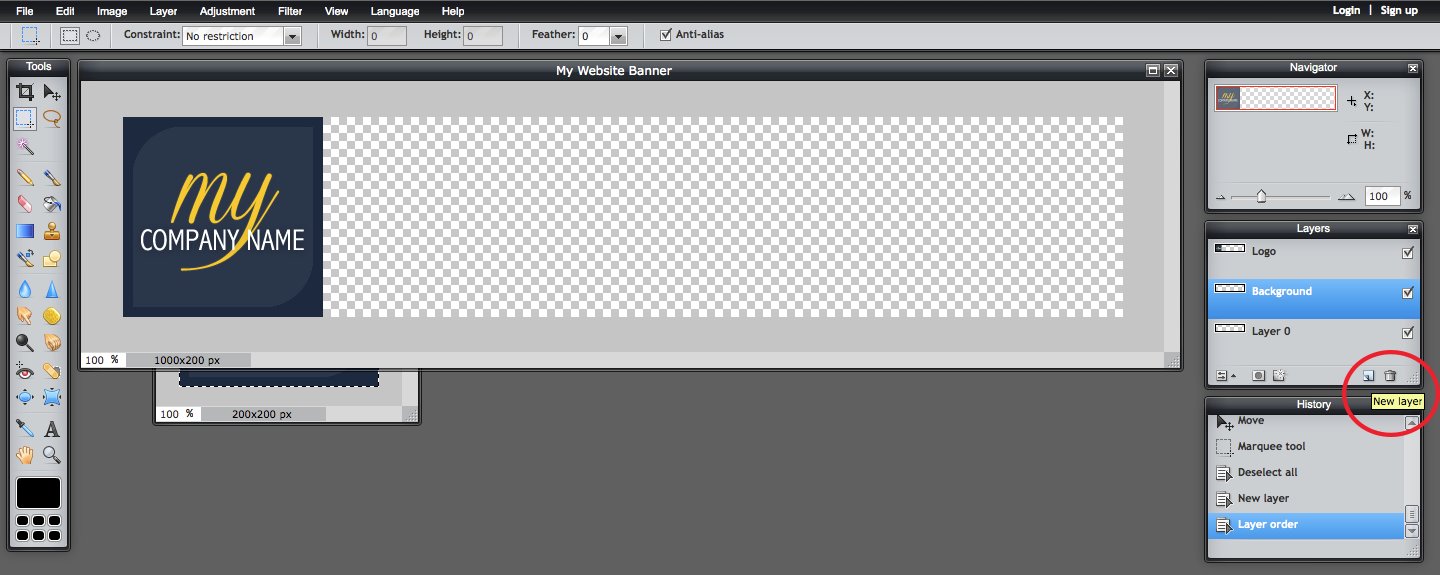
Adding a new layer.
Now, you can choose your colour and fill in your background.
For an exact match from your logo, you can pick your colour. To do this:
- Firstly, click on the “Paint bucket tool”.
- Then at the bottom of the left hand toolbar you can set the colour. Click on the “Set main colour” box to choose a colour.
- This will open up a “Colour Selector”.
- Rather than guessing what colour looks similar to your logo, you can use a “Colour picker tool” to pick out a colour from your logo.? This is automatically present when the “Colour Selector” is open. Simply hover over your logo and click on the colour you want whilst the “Colour selector” is open.
- The colour will now be selected on the "Colour Selector", click "Ok" to confirm.
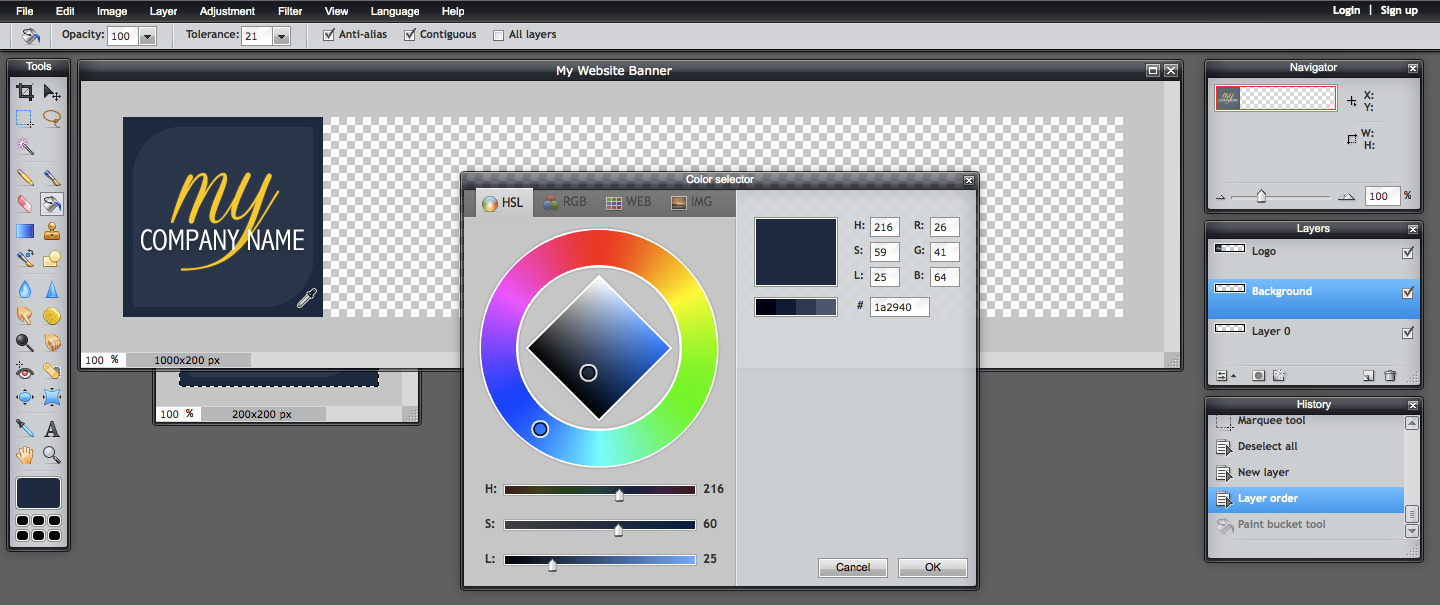
Picking your colour from your logo using the colour picker.
Now that your colour is chosen, to fill your canvas:
- Click “Edit” from the Pilxlr.com menu and then choose “Select All”. This will select your whole canvas
- Then, click the "Paint bucket tool” anywhere on my banner to fill it.

An example of a plain background banner.
At this stage, you could add a gradient colour effect on your background colour if you like. A colour gradient is a colour merging into another colour smoothly. This is something professional designers use occasionally for a smarter finish.
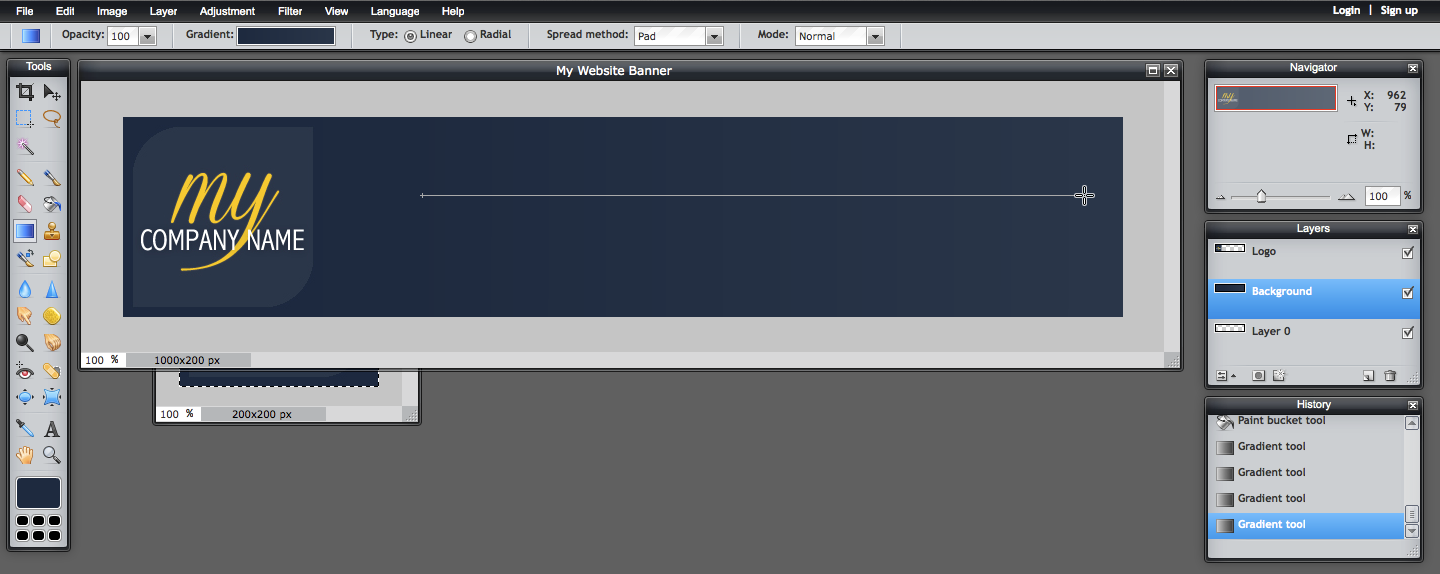
To do this, you will need to use the the “Gradient tool”:
- Click on the “Gradient Tool” from the left-hand toolbar.
- This opens up a colour gradient toolbar at the top of your working area.
- Here, you want to choose the two colours to merge together.
- Click on the coloured box next to the word “Gradient”.
- This brings up a variety of gradient options you can use.
- You will probably just want a two colour gradient. This is the default setting so you can now just pick the two colours that you want to merge.
- So first, you can click the left-hand little box that is filled in white, then click on the box titled "colour".
- This will open again the “Colour picker”, you can choose a colour from your logo, or a new colour.
- Then, you can choose your second colour that you wish to merge with your first colour, by clicking on the little right black box and following the same steps as above.
TIP - You can make a lighter version of your first colour, for a smooth transition. First, pick your secondary colour to be the same as your first colour, but use the “Colour selector” to adjust the tone. Simply drag the little white circle (that's in the diamond colour zone) up very slightly, to get a lighter version of your first colour.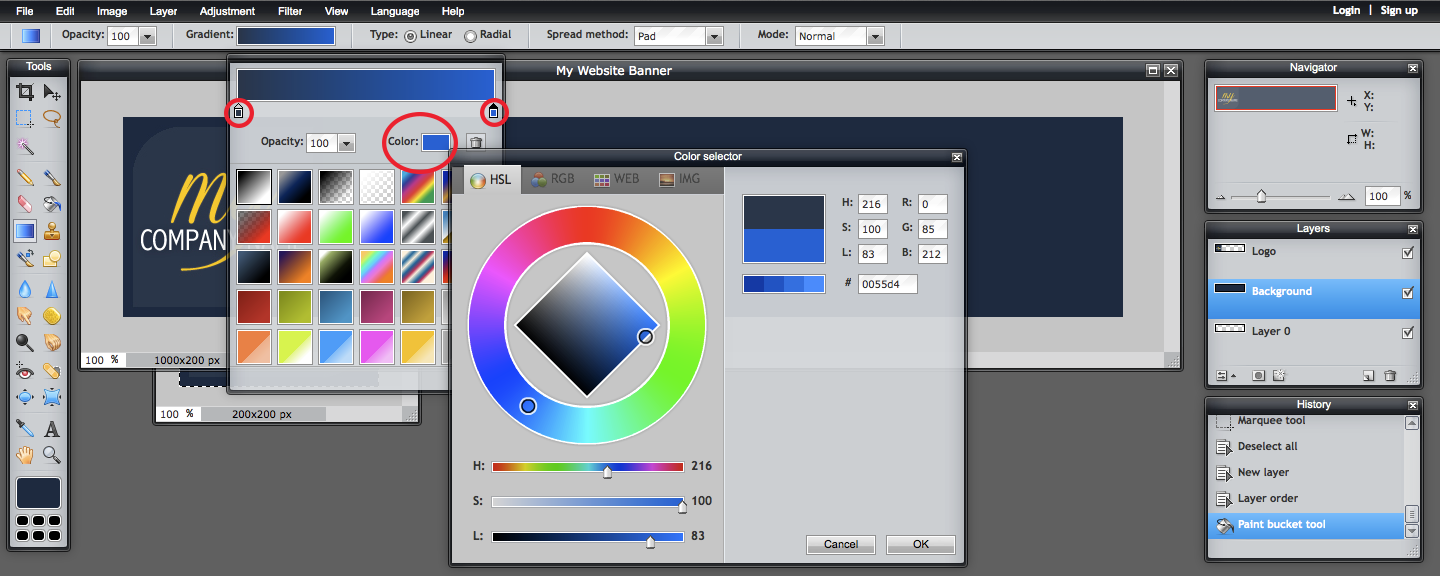
Picking your colours for your gradient.
To apply this effect to your banner, first make sure my background layer is selected, then click and drag your mouse from the left to the right of your canvas in a long straight line.
The line indicates in which direction the gradient will go and the length indicates the length of the colour merge. Play around here, to see what looks nice for you.
Drawing a line for you gradient.
Sometimes, it can be nice to have a clean and simple banner, but you might find you want to add some text to your banner.
You could add your company number or contact details but I am going to add a company slogan.
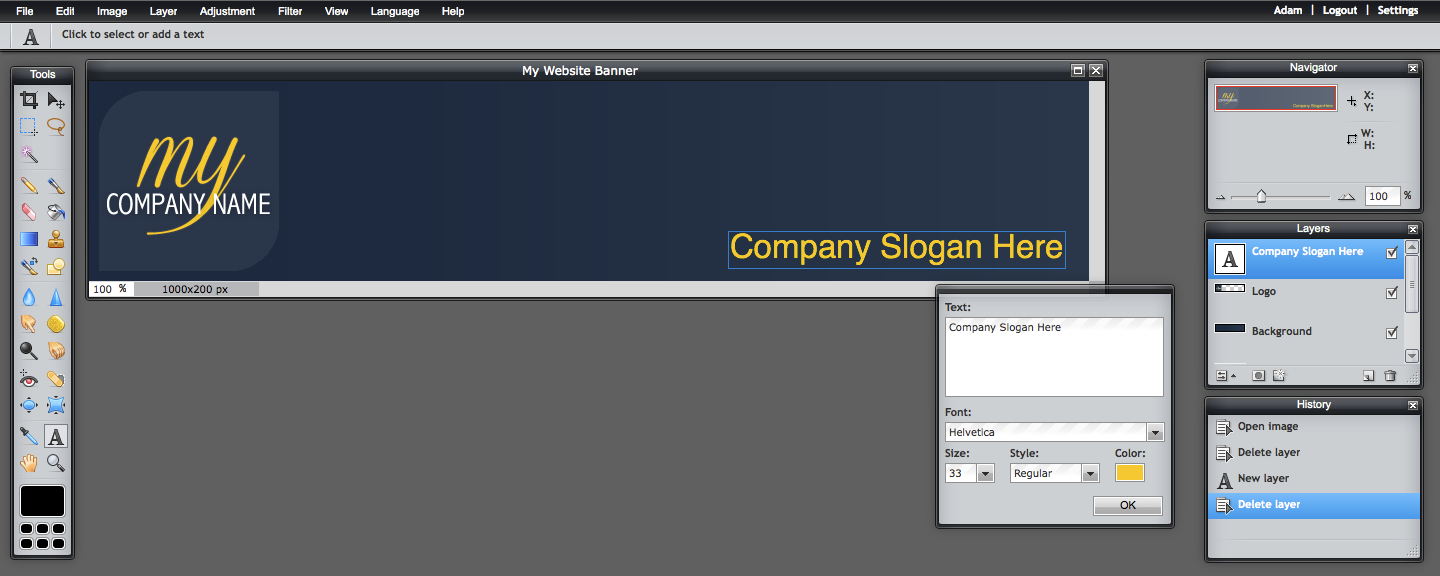
To add some text, please follow the steps below:
1. Click on the "Type Tool" to select.
2. Click on the canvas where you want to add your text. (You don’t need to worry too much - you can use the “move tool” later to reposition it).
3. This will open a box for you to enter some text. Here you can also choose a font.
5. You can also choose a colour for your text here, click on the “Colour” box to open the “Colour selector”.
TIP - Again, rather than trying to find a colour that works, pick a colour directly from your logo.?? Remember, when the “Colour Selector” is open, you can just click on any colour already on you canvas.
Writing a text on your banner.
If you like, you can apply some effects to the text to make it look more professional. You apply these as effects to your layers.
When you write some text, a layer for it is automatically made.
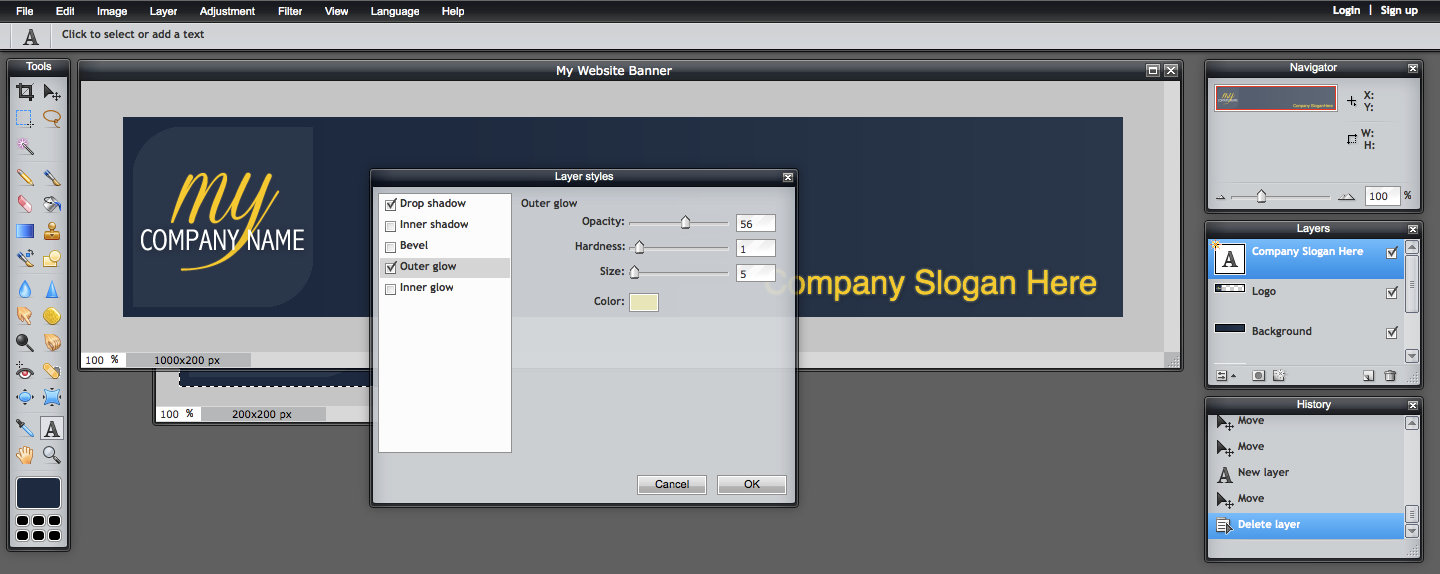
To apply some effects to your text:
1. First, click on the text layer then right click on it and choose “Layer Styles” from the pop up menu.
2. This will open the “Layer Styles” window.
3. There are lots of nice options here, you can play with them all to see what looks nice.
4. Two noteworthy options are “Outer glow” and “Drop shadow”.
To apply the Outer Glow:
1. Click on and check “Outer glow”.
2. This will open the customisations for this effect.
3. First, you want to choose a colour for your glow, so click the colour box to open the “Colour selector”.
4. Here, you can also reduce the slider for “Opacity” to make the glow have a softer effect.
To apply the Drop shadow:
- Click on and check “Drop shadow”.
- Pick your colour for your shadow - black or dark grey is fine for this.
- Again, you can reduce the “Opacity” to make it less intense.
Choosing your text effects using layer styles.
TIP - as you alter these settings you will see the effect live on your layer. Its not applied until you click “OK” so experiment until you are happy.
TIP - Its a classic designer tip to mix complimenting fonts. You can play to see what looks nice. But a good general rule is to choose different font weights from the same family to compliment, or mix fonts from different families to contrast.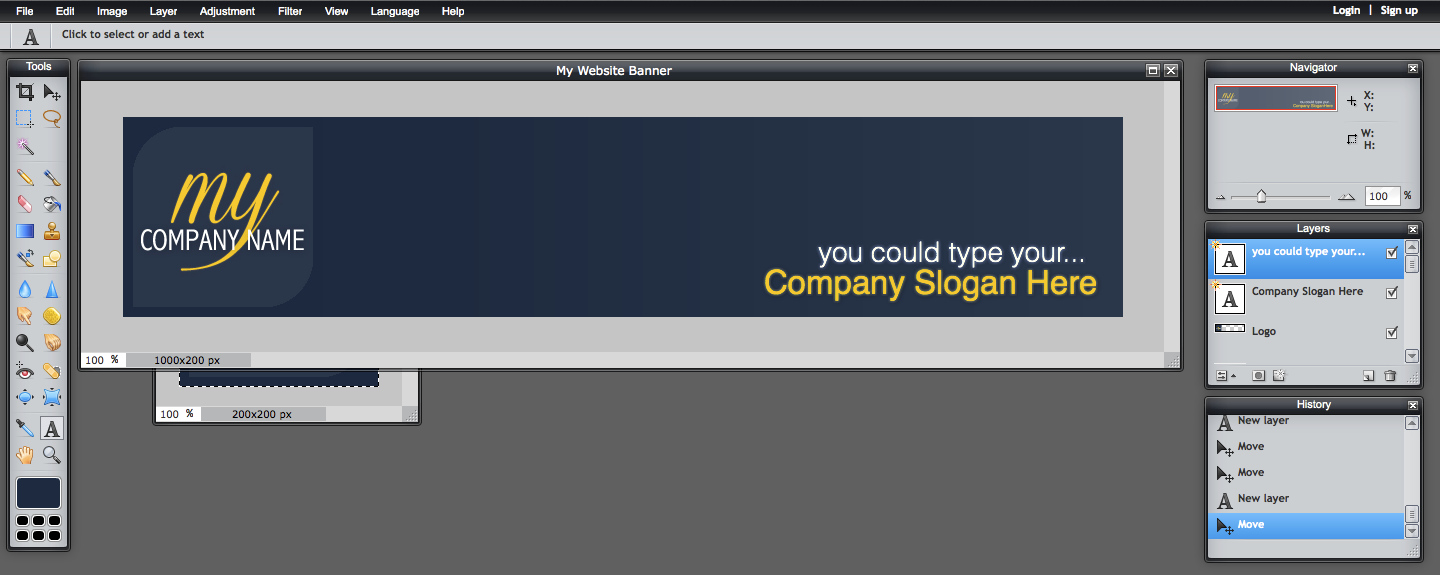
A nicely finished banner.
When you are happy with your banner, you can save it to your computer.
To save you work:
1. Click “File” from the Pixlr menu.
2. Click “Save” from the menu that drops down.
3. This brings up some save options.
4. Here, name your banner something relevant, then ensure that “JPEG” is selected from the “Format” drop down menu.
TIP - if you want your background to appear clear on your Create website, save your file as a "PNG" in the "Format" instead.
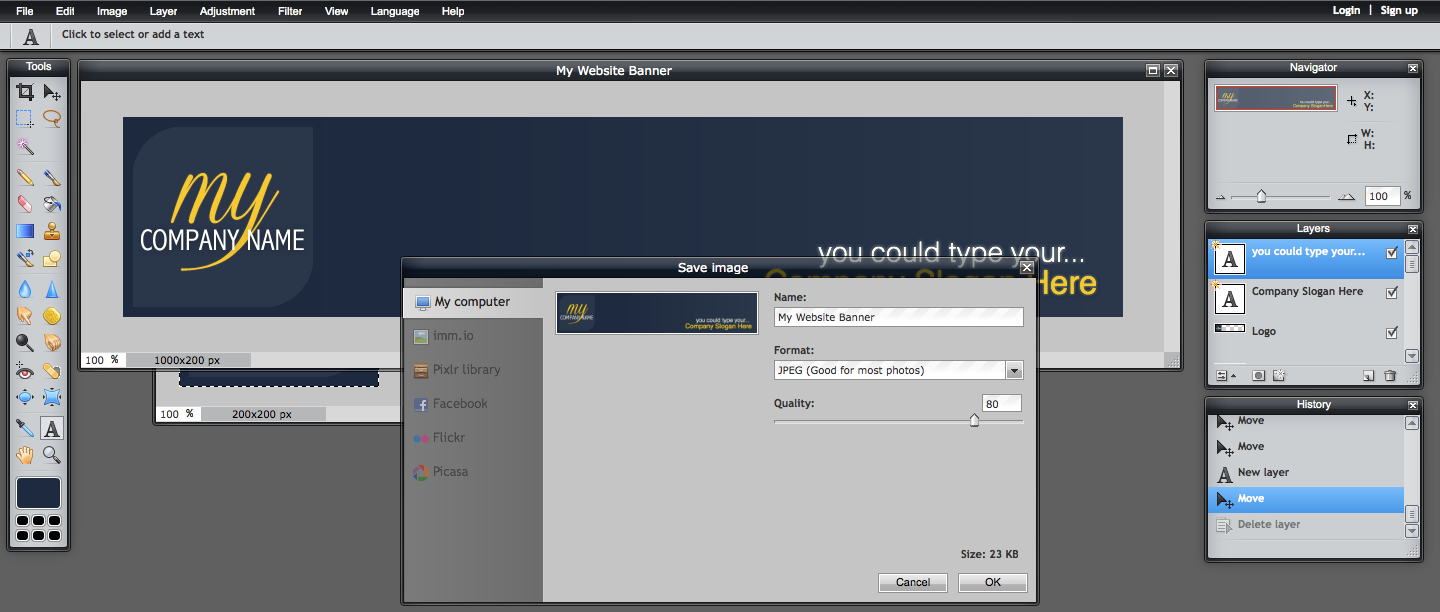
Saving your banner.
Once you banner has been saved you can follow the instructions to upload your banner to your Create website by clicking here.
For more information on using Pixlr.com you can read their help pages here: http://support.pixlr.com/pixlr.
If you need any help or assistance uploading your new banner to your Create account, please feel free to contact your account manager who will be more than happy to help.
Related Articles


More Questions?
If you have any further questions, please get in touch and we will be happy to help.
Get in Touch