Help Centre
Support > Promoting Your Website > General Marketing
How To Schedule A Blog Post
Blogs are a great way of generating interest in your site and can help improve your SEO. Rather than needing to be at your computer ready to post a blog at a specific time, you can easily schedule your blog posts in your Create account. This allows you to set and schedule content for weeks or even months in advance.
How To Set the Date and Time
Whilst you are editing/composing a Blog Post, you will see a Post Settings button located in the top menu bar. Click this button.

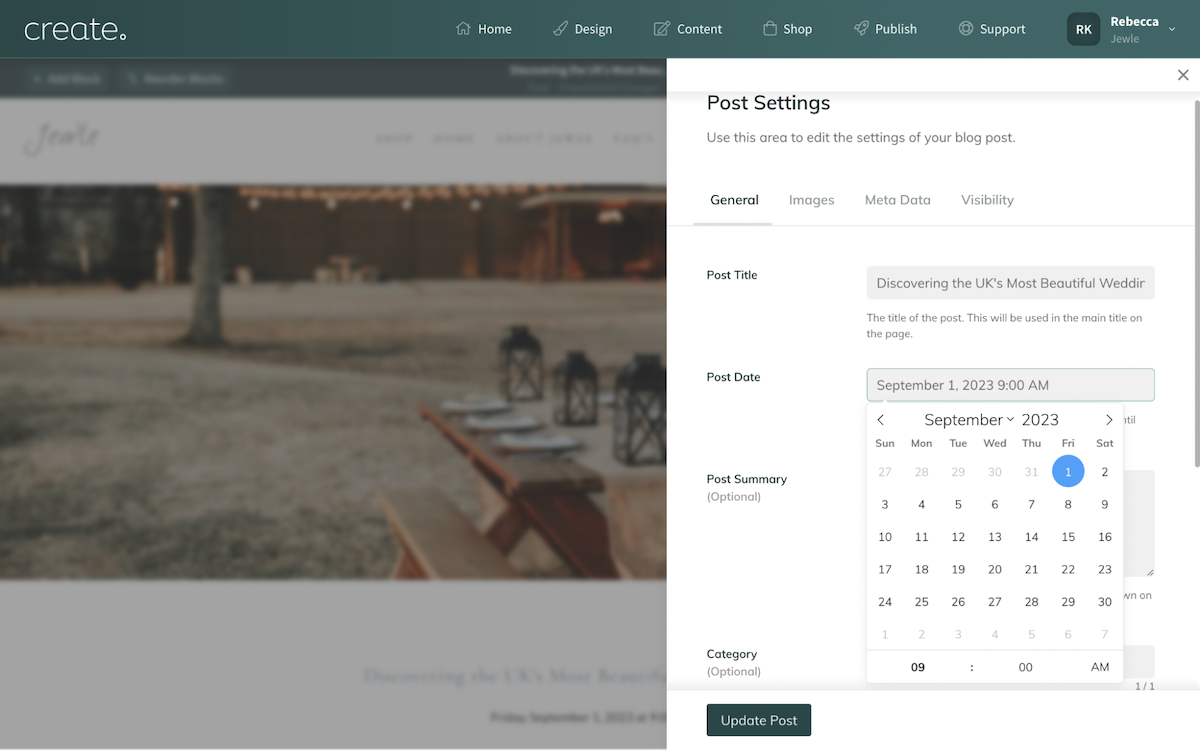
The Post Settings panel will slide into view. This panel allows you to access various settings and the Meta Data for the post you are editing. In the General tab, there is a Post Date section. Click on the field and a drop-down calendar will appear.

Using the calendar select the date and time you would like the post to appear. Once you have selected the date and time, click the Update Post button to confirm the changes.
Once you have finished composing your post and you are ready to schedule it, click the Save drop-down menu and you will see Schedule as a listed option, select this to schedule the post for your chosen date and time.

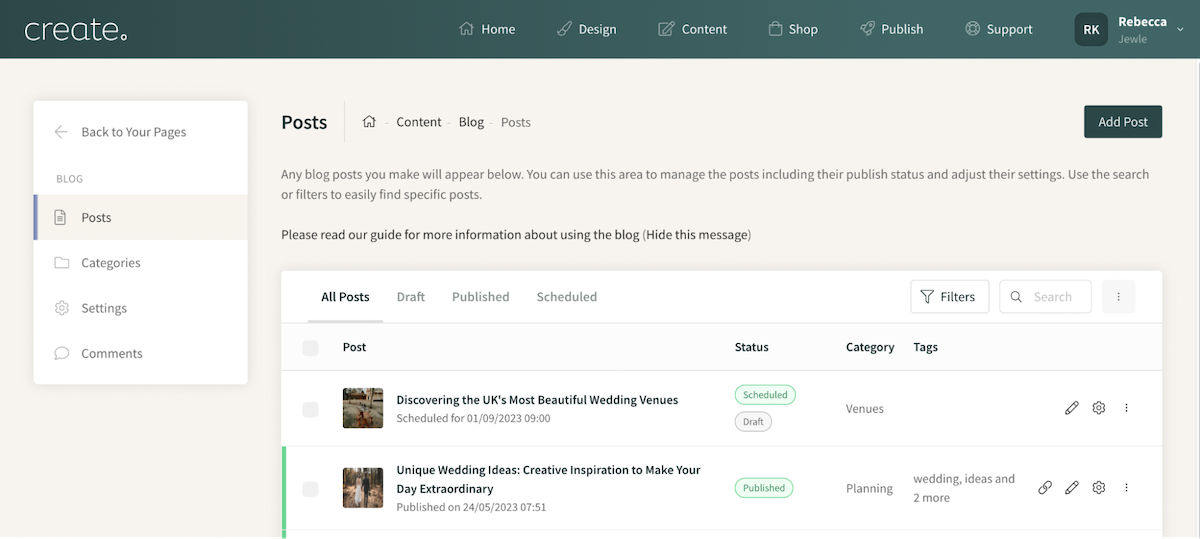
In the Posts screen, you will see the post listed with a Scheduled status along with the date and time it is scheduled for. Should you need to change the scheduled date later, you can do this by accessing the Post Settings again and choosing a new date.

Related Articles
More Questions?
If you have any further questions, please get in touch and we will be happy to help.
Get in Touch


