Help Centre
Support > Promoting Your Website > General Marketing
How To Set Up A Blog
Having a blog is a great way to keep your customers updated about the things you and your business are up to. It gives your company a personality so that customers and potential customers can relate to you more and can be used to promote new products and services you offer.
In addition to this, a blog can be very beneficial for your website SEO, as Google tends to favour regularly-updated content. It is also a great opportunity to get more of your targeted keywords onto your website.
In this help guide the following core areas of the Blog will be covered:
Setting Up A Blog
Blog Posts and Post Settings
Categories
Settings
Setting Up A Blog
To access the blog and start composting posts, locate the Blog listed in the Content area of your account and click the > to enter the Blog overview.
If you find Blog isn’t listed as one of the sections of your website on the Content screen, please click the Add Page button and select Blog from the Page Type screen to add it.
![]()
You will be taken into the Blog section of your account. This is the core area of the blog and will give you access to the following areas:
- Blog Posts and Post Settings
- Categories
- Blog Settings
- Manage Comments
Blog Posts and Post Settings
Use this area to set up a new post or manage existing posts. To add a new post, click the Add Post button, located top-right. You will then set the blog title and the address, followed by selecting a content layout to help get you started.
After you start drafting posts, they will appear in the Posts screen, allowing you to see an overview of your posts and access their settings.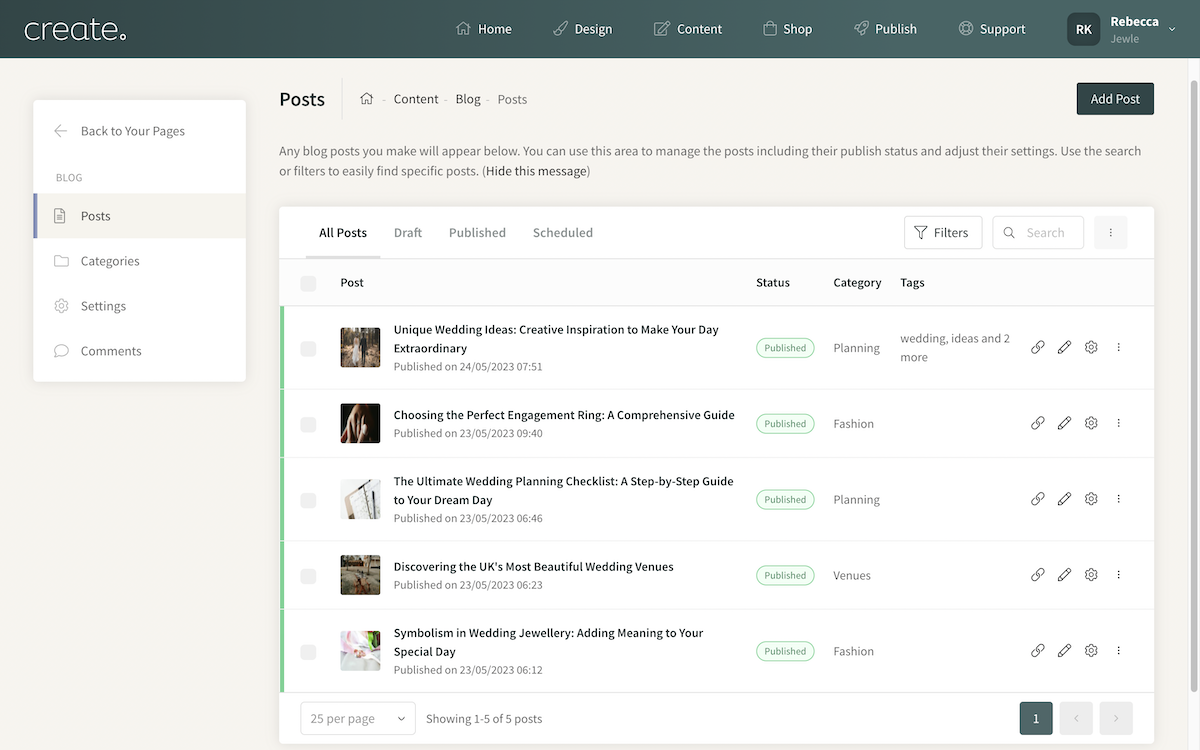
Building a post uses the same Block toolset and functionality as our Content pages, allowing you a lot of flexibility when compiling a post.
If you need a reminder of how to use our Content page type, please see this help guide.
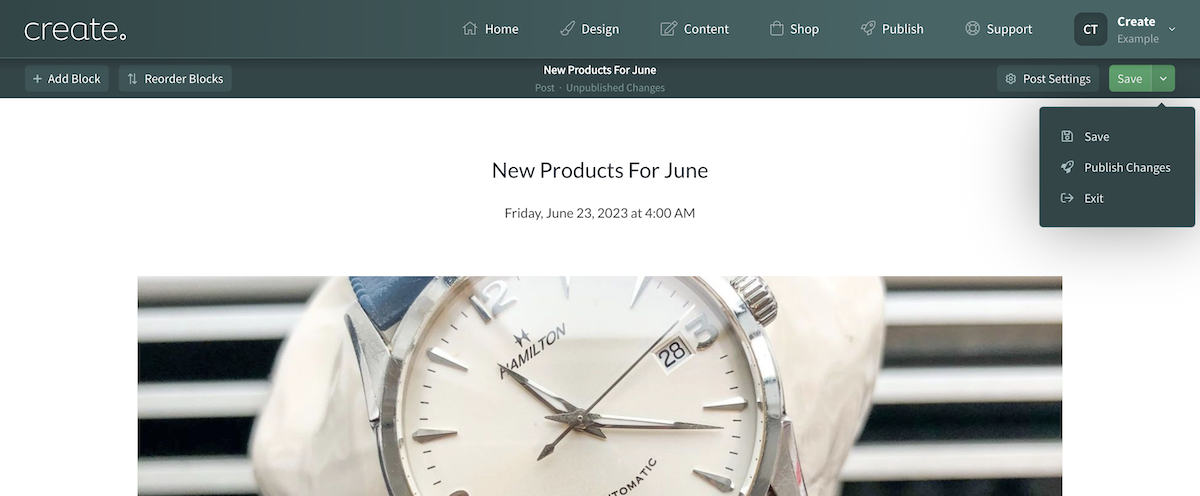
Whilst compiling a blog post, the toolbar will have several buttons for you to access.
Clicking the +Add Block button will display the block filter menu, giving you access to all of the different blocks Create offers to build the blog post you need.
The Save drop-down button will give you access to saving a draft, publishing the post, or discarding changes and exiting.
Post Settings
Whilst editing a post, you will have access to a Post Settings button, located in the top-right. Clicking this will open a panel allowing you access to specific settings for a post. In this section you can do the following:
- Schedule the post to appear at a future date
- Assign the post to a Blog Category
- Set a description for the post
- Set the Post Featured Image and optional alternative Listing Image
- Setup the post meta data
Categories
This area will display the categories you have set up and how many posts are in each category. You can also edit the category metadata from here by clicking the Edit Meta icon next to a category.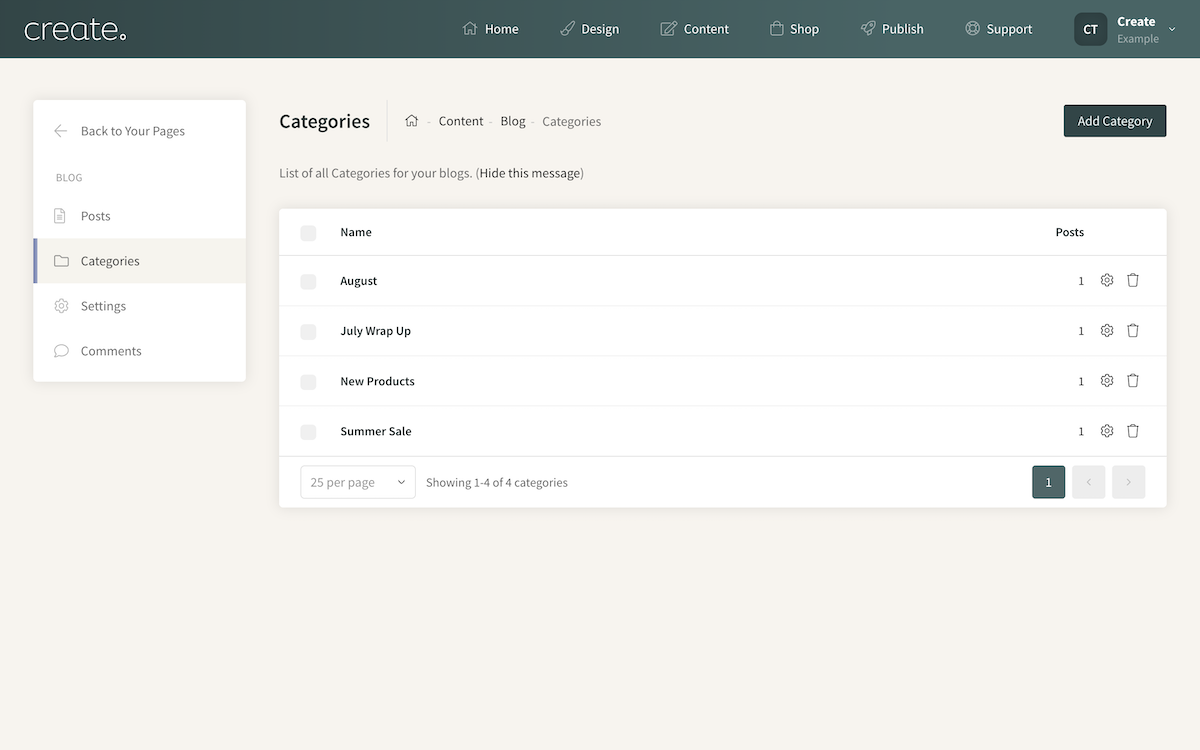
Settings
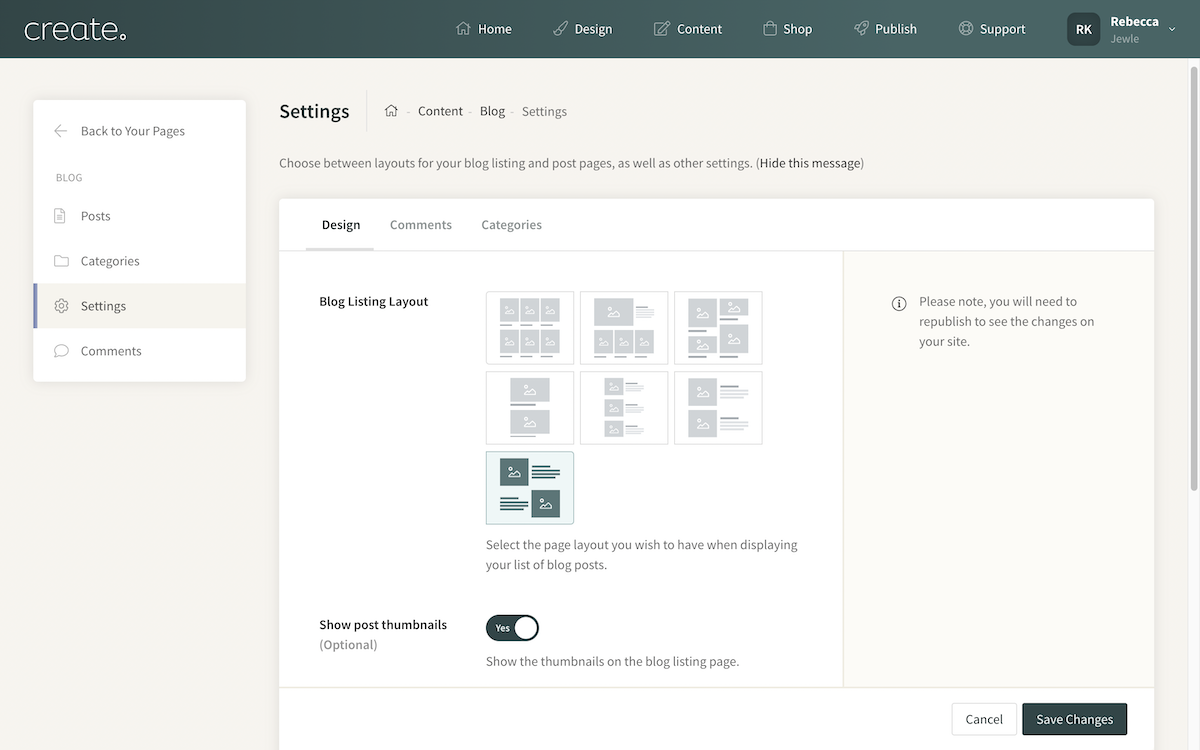
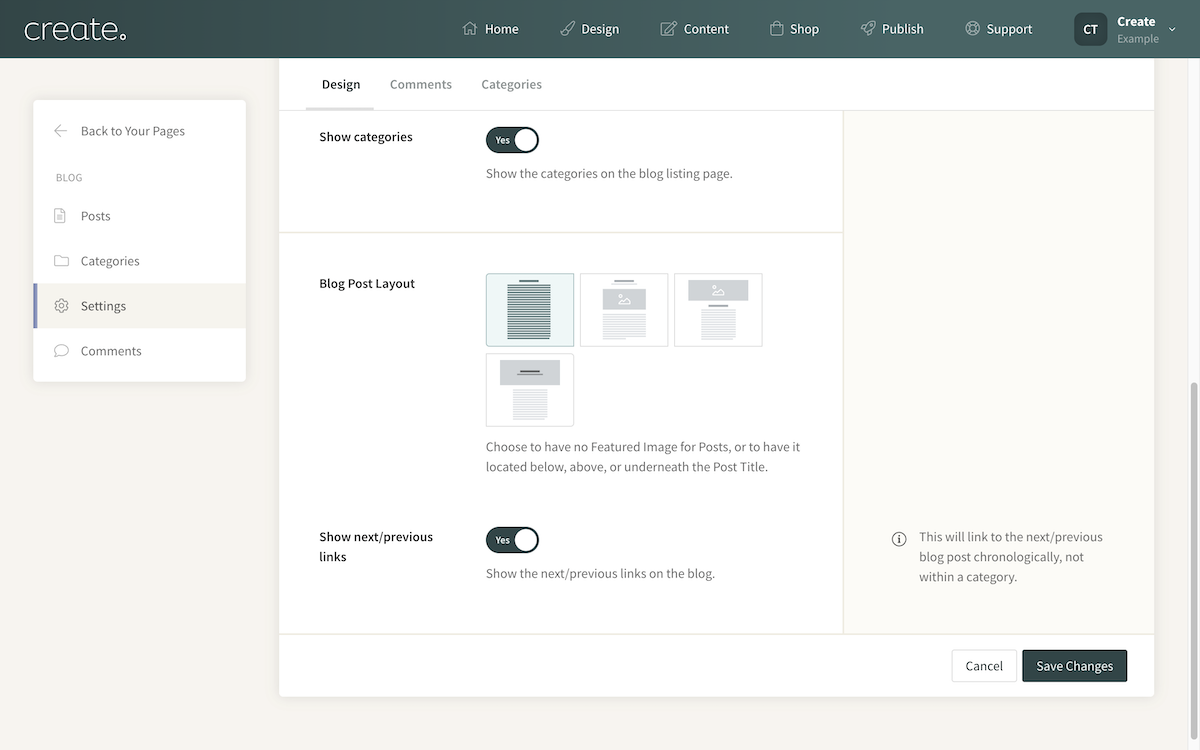
Gives you access to the Blog Listing Layout and Blog Post Layout settings. Here you can choose your preferred layout that will be used for the Blog listings section of your website. There are a range of different layouts, allowing you to choose the one which fits the style of your website the best.
The Blog Post Layout controls how the featured image (located at the top of the post) and Blog Title will display. It is a global setting that all of your blog posts will follow. We have options that allow for the title to be located above or on top of the featured image.
Show Next/Previous links will add arrows at the end of your posts that will take you to the next/previous Blog post.
Comments
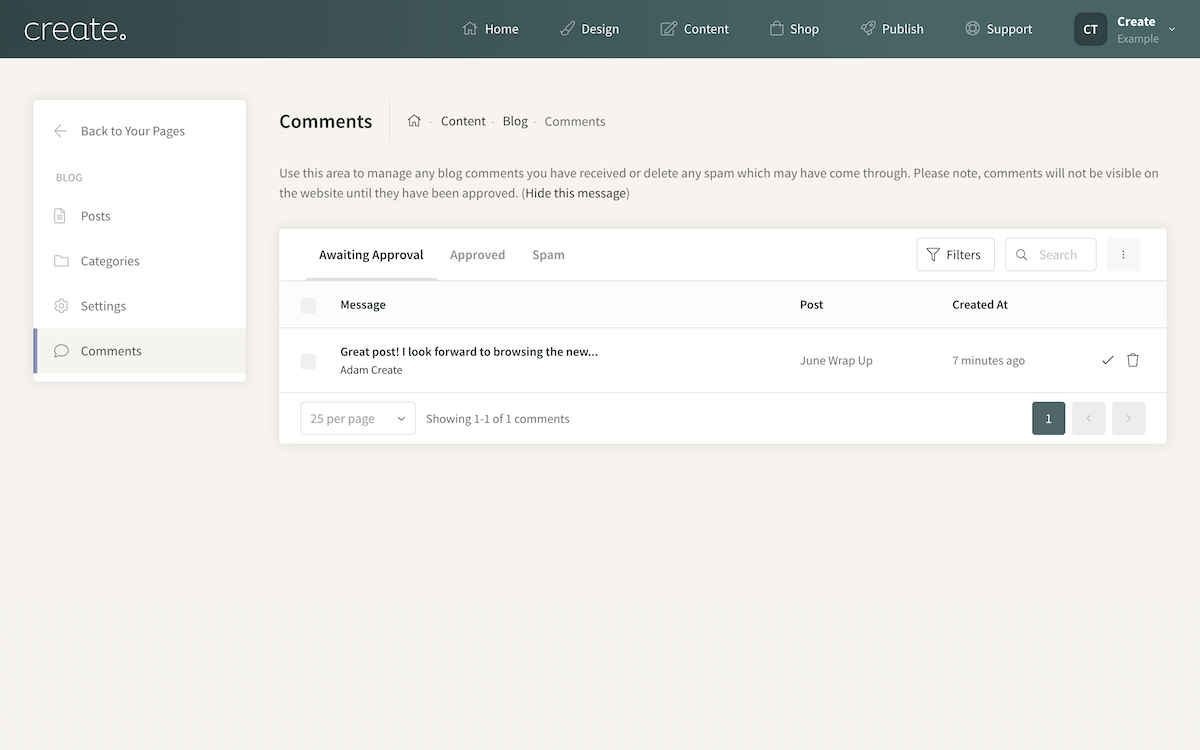
Use this area to review, approve or delete comments left on any of your published blog posts. Comments will not be displayed on your website until they have been approved.
All the comments awaiting approval will be listed in this area. It will show a preview of the message along with the Post they are associated with.
Click on a comment to open a panel showing the full message.
Use the tick icon to approve a message. Once approved, it will be displayed on the post right away.
Use the bin icon to delete a comment.
If you have any questions about any areas of the Blog, please contact your Account Manager who will be able to advise further.
Related Articles
More Questions?
If you have any further questions, please get in touch and we will be happy to help.
Get in Touch


