Help Centre
Support > Ecommerce > Accepting Payments Through Your Shop
How To Use Stripe To Accept Payments Through Apple Pay And Google Pay
 |
 |
Apple Pay and Google Pay are great additions to include on your website. It makes completing a purchase quick and easy for your customers and reduces address errors as there are no forms for them to complete.
Through a Stripe payment gateway integration on your website, you can offer customers the use of Apple Pay and Google Pay, as long as their devices meet the required criteria.
Before you can proceed in enabling Apple Pay and Google Pay, you will first need to set up a Stripe account and add it to your website. Please refer to this help guide for further details.
Activating Apple Pay and Google Pay In Stripe
Once you have Stripe successfully set up and functioning as part of your checkout, you’ll need to log into your Stripe account and follow the below steps:
- Click the Settings icon in the top right-hand corner
- Click the Payments option
- Click the Payment Methods tab.
In this area, you can control what payment methods you accept as part of your Stripe gateway.
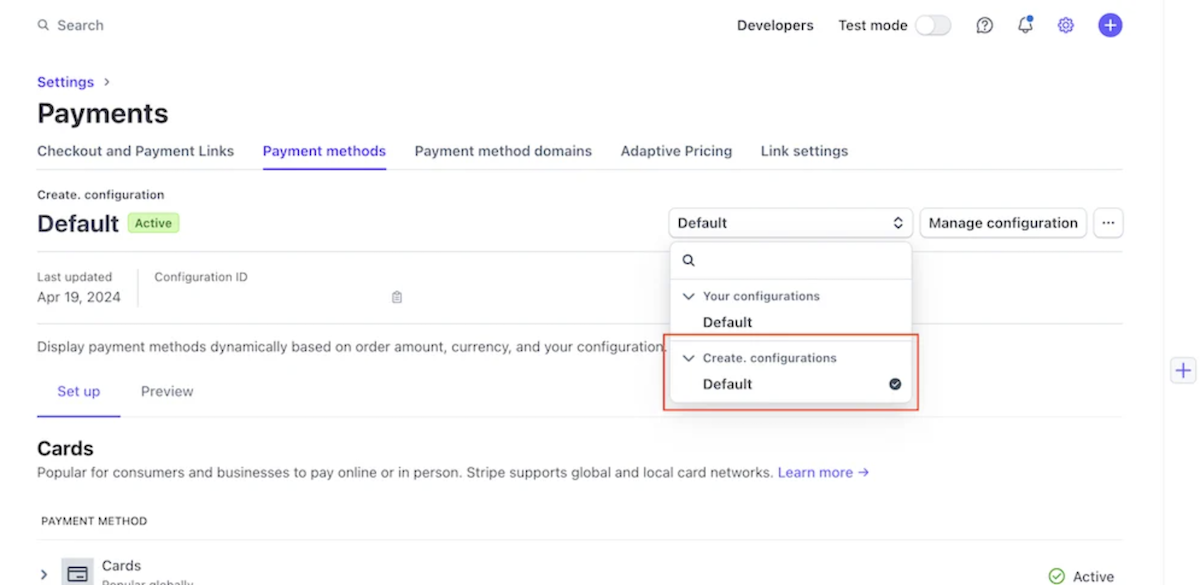
It’s very likely that when setting up Stripe with your Create account, Stripe will have added a separate Create configuration for you. You’ll need to make sure you’re editing this specific configuration.
If you click the drop-down option shown in the image below, you’ll need to ensure that you have your Create configuration selected.

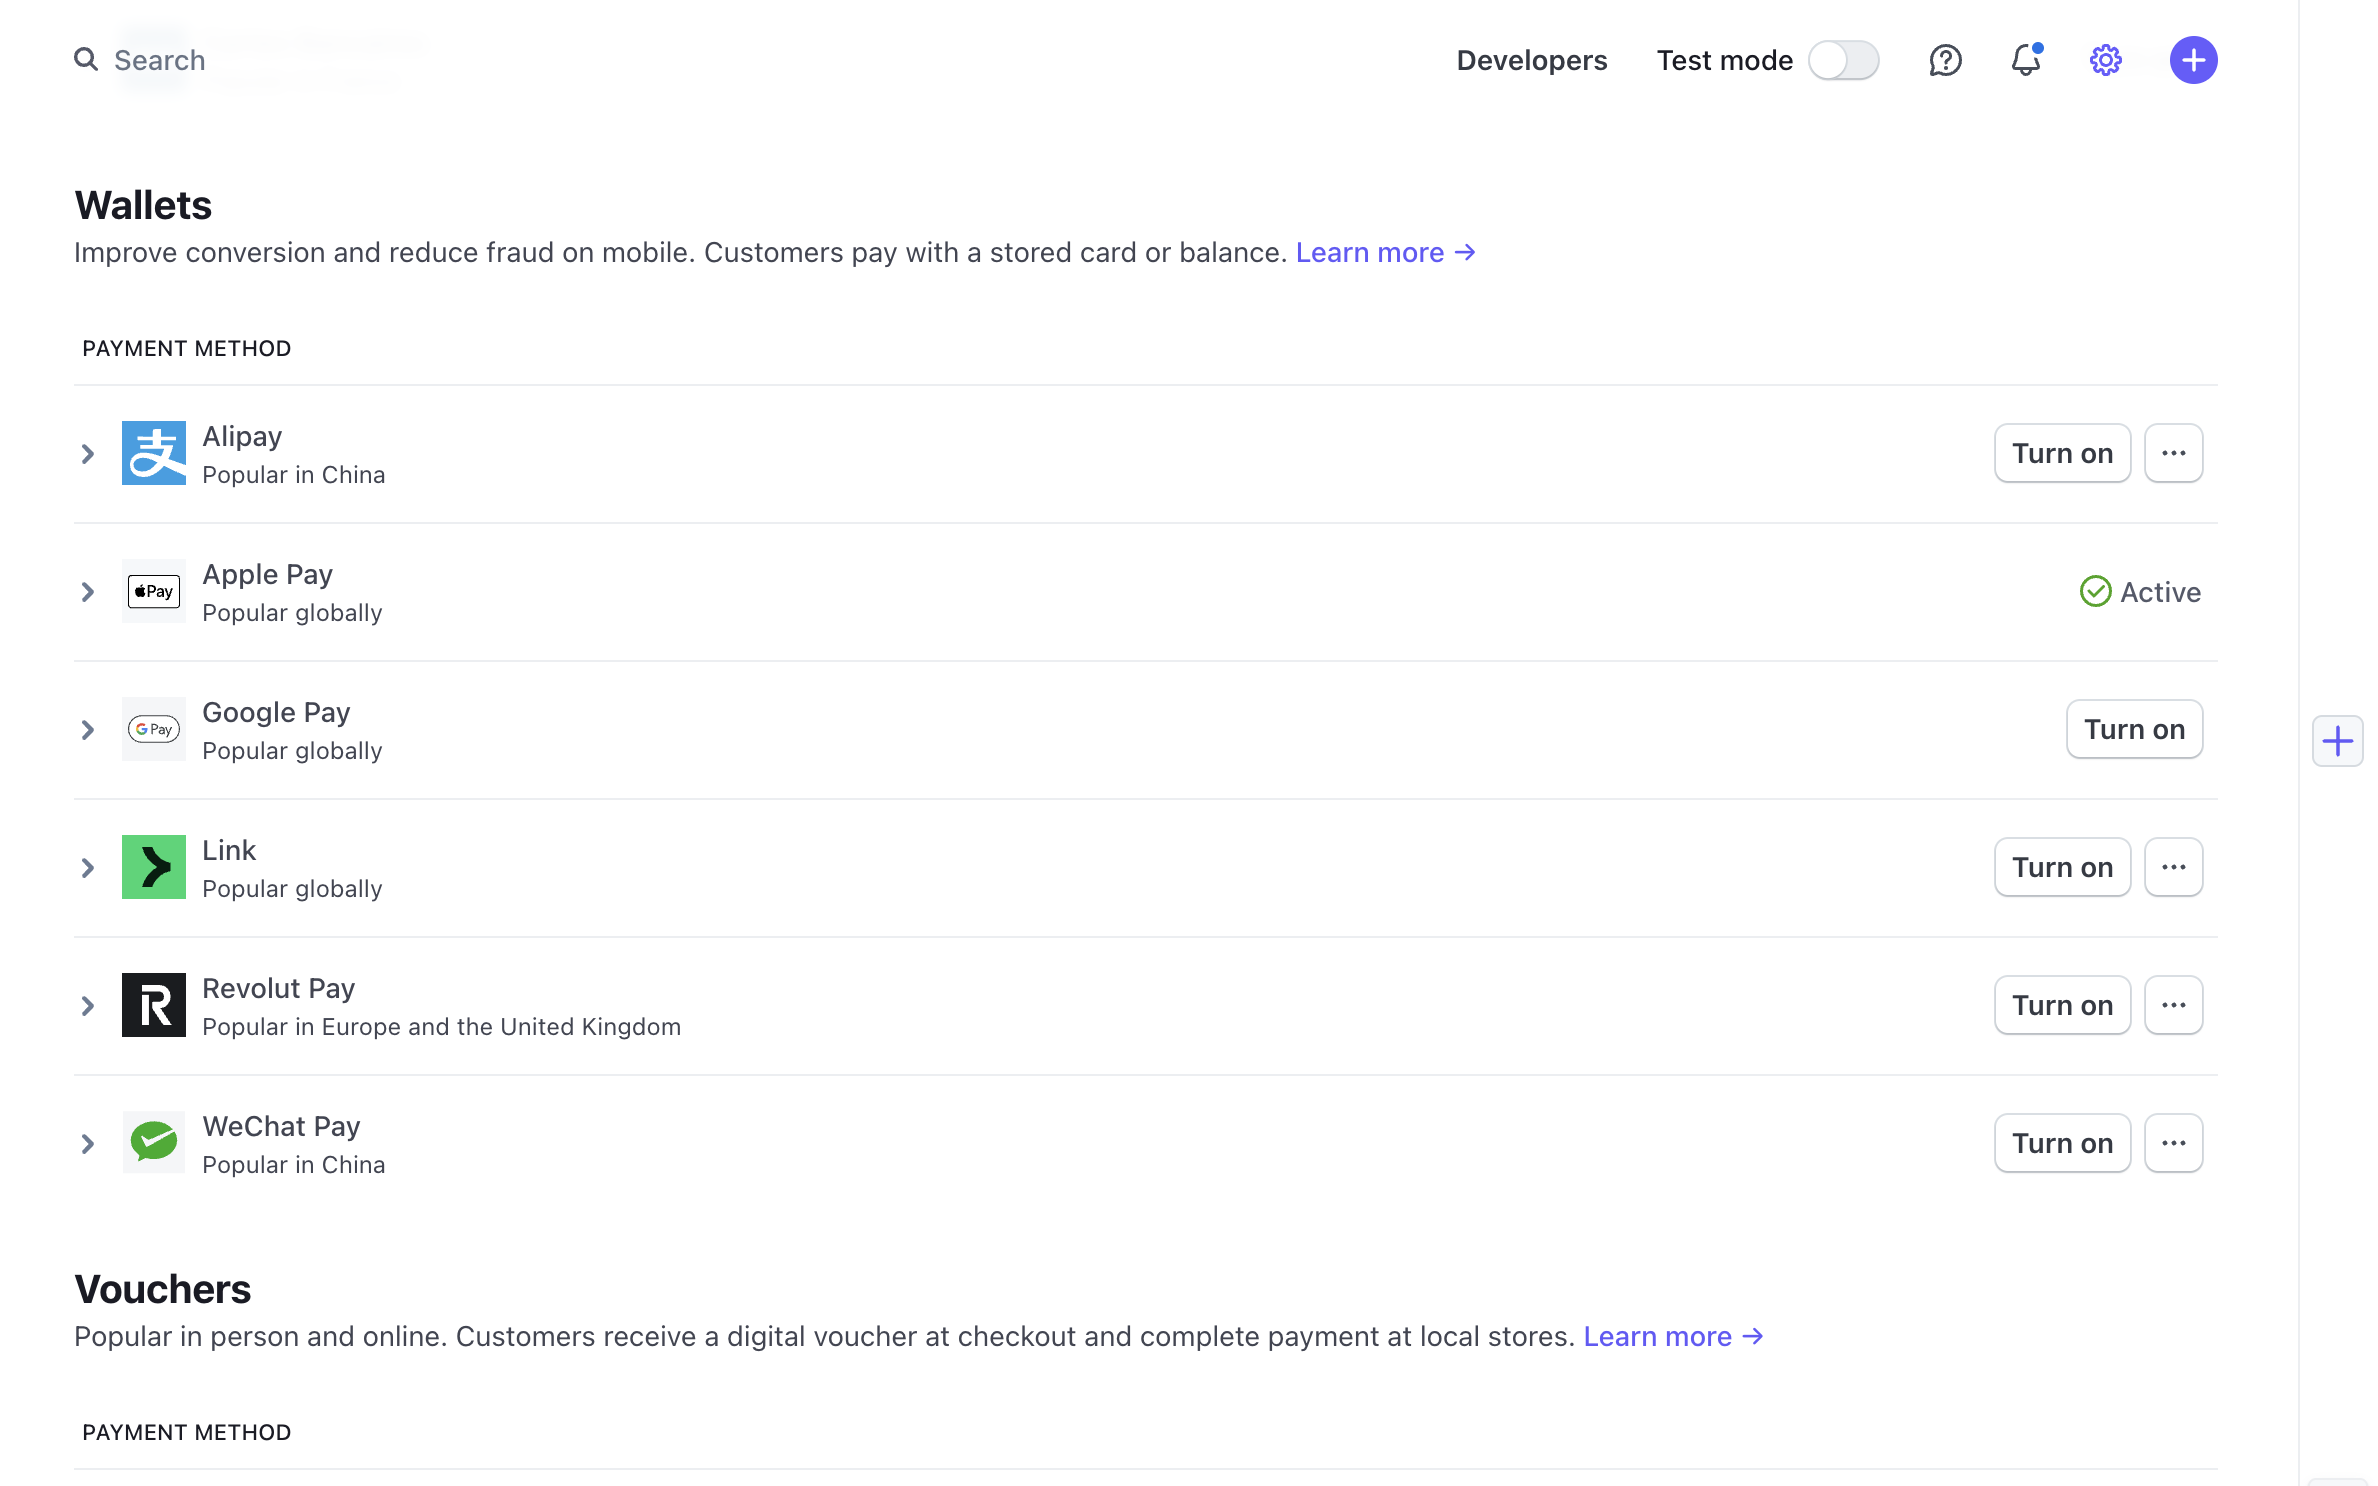
Once selected, if you scroll down to the Wallets section, you should see Apple Pay and Google Pay listed there. If they are not already showing as active, click the Turn On button next to them.

After enabling the above settings, Stripe will present these a payment method for your customers, as long as their device meets the criteria for Apple/Google Pay.
Related Articles
More Questions?
If you have any further questions, please get in touch and we will be happy to help.
Get in Touch


